Showing posts with label dessert. Show all posts

Thursday, September 1, 2022

Sugar Free Banana Bread / Cake for Baby Birthday

 So, uh, I don't think I ever really mentioned this specifically, but I have a child now.  And to my surprise, trying to keep [processed] sugar out of a baby's diet is not that easy.  Everything has sugar.  Even when you google "baby birthday cake" or "smash cake" or "sugar free baby cake" the options are limited and often have "alternative" sugars like stevia or monkfruit or whatever other nonsense.

With some research, I found a recipe that worked for us and that has since been approved by multiple babies AND adults.  Because I'm very anti-waste when it comes to food, I did not like the idea of giving my baby a huge cake and having a bunch of crumbs / messy food that wouldn't actually get eaten.  So I decided to make the "cake" in a mini muffin tin.  It actually works great, because you can cut off the muffin top and build a tiny little layer cake with "frosting."

This recipe made 24 mini muffins and a little 4 inch round cake (which was actually just me trying to use the extra batter).  It keeps well at room temperature for at least 2 days, but probably longer.  In the fridge, it's great for at least 3 days.  I can't speak beyond that because the cake is all gone now.

You'll find that this recipe is basically a banana bread.  If you double the recipe, it should be enough for at least two 6 inch rounds if you want to make a bigger layer cake (according to the original recipe I edited).

You'll notice that this has a good amount of "flavoring agents," aka lemon, cinnamon and vanilla.  That's because I believe that baby food should be flavorful and tasty, and that exposing our kids to strong flavors early in their life helps develop their palates and hopefully result in less picky eaters.  

You can also just use this recipe as an easy way to use ripe bananas when you have no eggs and want to avoid sugar.

Banana Baby Cake

  • 2 very ripe bananas (it doesn't matter what size, baking science is not that exact)
  • 3 tablespoons butter*
  • 1/4 cup full fat oatmilk (what I used) OR breastmilk, regular milk, etc.
  • 1 teaspoon lemon juice
  • 1.5 teaspoons vanilla extract
  • Full 3/4 cup flour (I did not sift or level, just scooped)
  • 1/2 tsp baking powder
  • 1/4 tsp baking soda
  • 1 teaspoon cinnamon

Preheat oven to 350F.  Melt your butter in the microwave.  Get a pastry brush and butter your mini muffin tin.  Use the remaining butter for the cake; it should be more than 2 tablespoons.  Alternatively you can use spray oils for your pan and just melt 2.5 tablespoons of butter for your cake.

Combine all the first 5 ingredients in a food processor / blender: peeled bananas, butter, milk, lemon juice, and vanilla.  Blend / puree until it's all smooth.

Pause and add your flour, baking powder, baking soda, and cinnamon.  Take a little spatula and stir gently so that the flour is a little bit incorporated.  This just stops it from exploding / splattering all over the place when you turn on your blender.  You can skip if you don't mind flour particles in the air.

Pulse blend several times until all combined and smooth.  People are overly anxious about overmixing. You won't; it's fine.

Pour into the mini muffin tin.  I recommend using a standard cookie dough scoop for this.  One scoop per well.

Bake at 350 minutes for 10 minutes.  If you're making a 4 or 6 inch cake, bake for 20-25 minutes.

Allow the cake to cool before frosting.


PB Frosting 

Combine 2-4 tsp of natural creamy peanut butter with a roughly equivalent amount of heavy whipping cream, slowly. Once the mixture is smooth, add 1 cup of cold heaving whipping cream and beat on high till stiff peaks form.  Keep refrigerated until use.

I prefer using a no salt, no sugar, no other additives peanut butter, but you can obviously use anything.  You could also just use plain whipped cream as frosting, no PB, but I like using common allergens because exposure helps decrease incidence of allergies.  Also you can easily replace with sunbutter or almond butter.

Thursday, September 8, 2016

Plum Torte Cake Buckle Heavenly Thing

Write this recipe down on a little sheet of paper and put it on your fridge.  That's what I did.  After I had already made it twice.  Now, that I've made it five times in the span of about two weeks, I can pat myself on the back and say, smart girl, you are.  This is one for the books.
This recipe - which I didn't even know was famous, but apparently, it is - is worth the hype, even if you didn't know it had any hype.  The plums (or peaches, or nectarines... really this is the easiest recipe ever to alter) bake up into these delicious sweet/tart pockets of jam that perfectly complement the light, fragrant, moist crumb of this cake.  Torte.  Buckle.  Heavenly thing, whatever you want to call it.


I can't say much more about this because I have already rambled on too much, but it's so easy to make, you might as well make two, because you're turning on your oven anyway, and you'll regret it if you don't.  Slice the extra one and store the slices in little ziplock baggies in the freezer.  Pull out anytime you need a snack or want to add an extra treat to someone's (aka your own, if you live alone, like I do) lunch.
Bring this to any birthday party, baby shower, picnic, or dinner party and it'll be a hit.  It's easy, elegant, and requires no additional side servings of whipped cream, coffee, or ice cream to be a hit.  But what the heck, it doesn't hurt to add them if you want.

As if typical of me, I took no pictures of this cake any of the times I made it, and now I am sitting in my apartment without enough eggs to make another cake in order to take a picture of it, so the lovely illustration above was done by yours truly for the benefit of whoever is reading this.  I hope you appreciate my artist representation.  If you want pretty pictures of this torte, go here, which the blog where I actually got the idea to make this recipe.


Heavenly Plum Thing
barely adapted from Marian Burro's recipe

½ cup salted butter, softened
¾ cup sugar
2 large eggs
1 teaspoon vanilla extract (optional, but why leave it out?)
1 cup unbleached all purpose flour, sifted
1 teaspoon baking powder
Pinch of salt  (not optional)
3-5 large plums or peaches, or 8-12 small plums (really just use your judgement here, this isn't hard)
1-2 teaspoons raw sugar (optional)
1 teaspoon cinnamon

Preheat your oven to 350F.
Cream the sugar and butter in a bowl.
Add the salt, eggs, and vanilla and beat well.  Let it all get very fluffy.
Add the flour and baking powder, and mix well.
Spoon the batter into a spring form of 8 or 9 inches.
Place the plum halves skin side up on top of the batter. Sprinkle lightly with cinnamon and raw sugar.
Bake one hour, approximately.
Remove and cool.
Eat.  Enjoy.
Repeat as many times as necessary.

Sunday, May 10, 2015

Creme Brulee French Toast - my new favorite


This is it.  You've found it: the only thing you'll want to eat for breakfast, brunch, lunch, and dessert for now on.  I mean, who doesn't like French toast?  Now add on the textural component of a crunchy caramelized crust and this dish is irresistible.

I made this crème brûlée French toast (aka The Best French Toast Ever) for the first time when I had some girlfriends coming over for brunch.  I've never actually hosted a brunch before, so I wanted something that was easy, but also really delicious.  Step in New York Times.  A few months ago when I was browsing their food section, I stumbled across this recipe, which I immediately printed out.

The New York Times recipe was for oven baked French toast with a brown sugar caramelized crust.  I typically make my French toast in a skillet (as I assume most people do) and it ends up being very annoying because you can't make French toast and eat it at the same time.  This obviously makes serving breakfast or brunch to other people somewhat difficult if you're trying to do a big batch.  The idea of baking French toast is not unheard of, but it was the caramel that really sold me.

Now, of course, if you  know me, you know that I never follow any recipes, so I had to make some edits.
First of all, the original recipe calls for challah bread.  I don't know about you, but I never have challah bread just sitting around at home.  I also don't know if my regular grocery store sells it all the time.  But I do know that they sell croissants.  In fact, in the "clearance" section of the bakery, where they place items that are close to expiration, there is almost always a container of croissants, which are perfect for making French toast (especially since French toast is best made with bread that is slightly stale).  I also find that croissants make much more attractive French toast and their texture is perfect for absorbing the "custard mixture" while still retaining some wonderful pastry flakiness.
Secondly, I didn't soak my French toast overnight.  To me, this is overkill since I prefer my French toast "crunchier" or "flakier."  Feel free to soak yours though, if you're partial to the bread pudding texture.  I only did a quick dip into the egg mixture and that was enough.
Third, the original recipe had a ridiculous amount of liquid: 6 eggs and 3 cups of liquid.  Too much milk, too much cream, and way too many eggs.  What for?  You just end up throwing away most of it!  It's wasteful!  So I seriously cut back on the liquids.  I wanted to use every single drop.  I also didn't use cream, since this is already a pretty indulgent dish; we don't really need that extra fat content.
Lastly, and most importantly, I wanted the sugar to truly become caramel; I didn't just want wet sugar.  So I actually place the baking sheet with the brown sugar in the oven first, so that the sugar starts to melt and caramelize, and then I put the French toast slices on top to bake.

The result was stupendous.  The croissants were flaky on top, crunchy with on the bottom from the caramelized sugar, and luxuriously decadent in the middle.  Served with some bacon (which can be baked in the oven at the same time!) and some berries, this is a great way to entertain any breakfast guests... or, just you and your partner!


Crème Brûlée French Toast  aka 
The Best French Toast Ever
3/4 cup pack dark brown sugar
3 tablespoons salted butter, cut into small pieces
4 croissants  (alternatively, use 8 one-inch thick slices of challah bread)
2 large eggs
1 cup milk (I use non-fat)
2 tablespoons dark rum  (optional, if you're serving this to children)
1 teaspoon vanilla extract
generous dash of kosher salt
pinch of cinnamon (optional)
pinch of nutmeg (optional)


1.  Cut the croissants in half like you're about to make a sandwich.

2.  Spread the brown sugar evenly over a 9x13 baking pan and add the piece of salted butter on top.

3.  Preheat the oven to 350F.  Put the baking pans with the sugar mixture into the oven on the middle rack.  This will start to cook the sugar while you prepare the rest of your ingredients.
*The whole process of making the "custard" and dipping the slices should take you less than 5 minutes.  If it takes you longer than that, don't put your tray into the oven until later; you don't want the sugar to burn.

4.  In a large bowl, whisk together the eggs, milk, rum, vanilla, salt, nutmeg, and cinnamon.  

5.  Dip each slice of croissant / bread into the custard mix, making sure to coat both sides evenly.  Make a pile of dipped slices on a plate.

6.  Once all of the slices have been dipped, take the baking pan out of the oven.  The brown sugar and butter should be melted and bubbling hot.

7.  Arrange the croissant / bread slices onto the baking tray, on top of the caramelized sugar.  I placed the cut-sides of  my croissants face-down (in the picture above, the slices were flipped, after they finished baking).

8.  Bake at 350F for 20-25 minutes or until the tops are golden brown.

9.  Serve while hot, with the caramelized brown sugar side up.  Goes well with berries, sliced peaches, and bacon.

10.  Bask in the glory of crème brûlée French toast.

Sunday, April 5, 2015

Ken's Artisan Bakery and Portland

If there's anything you surely must know about me, it's that I am a dessert person.  Above all else (except, maybe, sleep), I love sweets.
So when I started looking up places to eat in Portland and I heard about Ken's Artisan Bakery and the croissants, macarons, and other pastries that come out of their ovens, I knew that I had to go.
In fact, on my first day in Portland, this was the first place I went to start my morning.  It was a great decision.  Friendly service, yummy pastries, good food, and reasonable prices.  I had no complaints!

I walked in at around 10ish on a Friday morning, and many of the tables were taken. I took that as a good sign. I lingered near the cash register for a while, debating what to drink and what goodies to try. I apologized for not being able to make up my mind, but the man behind the counter was really patient with me.  I ended up ordering an Oregon croissant, a blood orange macaron, and a cafe latte (as per the suggestion of the man behind the counter).

I settled down at one of the empty tables I managed to snag to enjoy my breakfast. The coffee wasn't that strong and wasn't that hot, so I didn't really enjoy it much, but that might also be because lattes aren't normally my thing and this place obviously isn't a coffeeshop. On to the sweet stuff!
The Oregon croissant has marionberries baked into the flakey pastry, and its flecked with sugar crystals, which add a nice combination of soft tartness and sweet crunch. I polished this off quickly, and I liked it so much, I ended up coming back to the bakery before I left the city to buy two more to keep me company on my travels home. The croissant is the perfect breakfast since it isn't too sweet.

The blood orange macaron I ordered was also delicious. The candied kumquat on top added a perfect little bit of acidity to offset the sweetness, and the texture of both the macaron itself and the filling were perfect.

I also decided to eat lunch here with my friend G, who lives in the city.  We both went with their lunch deal, which is either a half soup or half salad with a half sandwich combo.  G. went with salad and sandwich while I went with soup and sandwich.  For a mere $8, I had an egg salad sandwich and white bean soup. Both were delicious. The soup was warm, hearty, and perfectly seasoned. It was great for a drizzly day. The egg salad sandwich was well balanced - egg wasn't chopped too small, there wasn't an overwhelming amount of mayo, and there was just a slight bite from the mustard. The bread they used was sturdy but not heavy, and I liked their plating with the edible violet.
If I lived in the area, I think this would be my go-to spot for sweets and lazy day lunches.

Tuesday, June 17, 2014

Strawberry Rhubarb Oat Bars / Rustic Tart


I love summer fruit.  I could easily eat several pounds of strawberries for a meal.  In fact, I have.  That's one of my favorite things about going berry picking.  But what this means is that I rarely ever bake berries when I have them because I find the fresh product so tantalizing.  It's hard to save any for a cake or pie.  This year, however, I impulsively bought some rhubarb at the market and I knew they'd go well with some strawberries, and since you don't eat rhubarb raw, one thing lead to another and before I knew it, I was in the kitchen making these bars.

I want to call them oat bars because the name has a healthy sound that seems to justify my eating them for breakfast.  Both times I made this recipe though, I actually used a 9-inch spring form tart pan and I thought it worked beautifully and would be a lovely way to make this for a picnic or dessert when entertaining so hence why I am also calling this a rustic tart.

This recipe is so simple - it honestly takes no more than 10 minutes of prep time, and that includes washing and cutting the fruit.  There are weight measurements for the oat base, which makes it easy to do everything with a kitchen scale, just kitting the "Tare" button as you go.  Then, the ingredients are mixed in whatever pan you'll be baking with, and the fruit is only lightly sweetened, so the natural flavor is really allowed to shine.

I have a feeling that if you make this once, you may find yourself eating it for breakfast, lunch, and dessert, just as I did.


Strawberry Rhubarb Oat Bars
adapted from Smitten Kitchen
yields one 8x8 pan OR one 9 inch tart pan


1 cup (80 grams) rolled oats
3/4 cup (95 grams) all purpose flour
2 tablespoons (15 grams) whole wheat flour (if you don't have this on hand, just use all purpose flour)
1/2 cup (95 grams) light brown sugar
pinch of salt (1-2 grams)
6 tablespoons (85 grams) salted butter, melted
1-2 stalks of rhubarb, diced small
1 cup (1/2 pin) small-diced strawberries
1 tablespoon (15 grams) granulated or raw sugar

Preheat your oven to 375 degrees F.  Lightly butter an 8x8 baking pan or a 9-inch tart pan.
Combine the oats, all purpose flour, whole wheat flour (if using), brown sugar, and salt in bottom of baking pan and mix.
Pour the melted butter on top and stir until clumps form.   I find it easiest to do this with my hands.
Optional: set aside 1/3 cup of the crumble mixture if you want a topping.
Press the rest of the crumb mixture evenly against the bottom of the pan.
Spread your diced berries and rhubarb evenly over the crust.  Sprinkle with granulated or raw sugar.
Scatter reserved crumbs (if using) over the fruit.
Bake bars on the middle rack of your oven at 375F for 30 to 35 minutes.
Allow to cool in pan before cutting.
Note that bars will crisp up in the fridge if placed there for a few hours after cooling.

Leftovers can be stored in the fridge for up to 3 days (if they last that long!).  Bars do get a little softer on the second day, but they remain just as delicious on day 3 as they are when fresh out of oven.

Monday, May 19, 2014

Making Madeleines

On our first Christmas together, B. got me two trays of madeleine molds.  I didn't use them right away because I had never made madeleines before, but after about 6 months of disuse, he told me he would make me a batch.  I'm normally the baker in the house, so it was nice to be spoiled by him.  We used the recipe that had come with the trays, but it wasn't quite what we were looking for.
This week, my husband decided it was time to make madeleines again, so I looked up a recipe online.  One of the first recipes I stumbled upon was Dorie Greenspan.  Her recipes are quite popular among food bloggers and her pictures showed a very big "hump" -- which is very desirable in madeleines.  We had not had humps in our last homemade batch, so I was interested in trying her recipe and her method.

We were quite pleased with our results, and when B. brought some to his office to share with co-workers, he said they enjoyed them as well.  This recipe is not at all intimidating, and I'm glad we decided to try it.  I have no idea why it took me so long to get around to making them, but homemade madeleines are a lovely treat.


I did, of course, alter a few things.  First, the original recipe calls for lemon zest.  I never buy lemons because they're more expensive than limes.  These past few months, however, we've been eating a lot of oranges, and whenever I buy particularly beautiful citrus from a good source, I will wash them, zest them, and freeze the zest for uses in baking, cocktails (mocktails for me; cocktails for B.), cooking, and so on.  So I had orange zest on hand.  I eyeballed out what I thought was the appropriate amount for one orange (though really, this depends on how well you zest your fruit... on cooking shows when I watch them zest, I am appalled by how much they waste).  I thought the orange flavor was beautiful and I will be repeating the recipe this way from now on.

Second, I used a hand blender (also called an immersion or stick blender) to really chop up the zest and mix it with the sugar and egg.  I thought this helped infuse the flavor, but it's probably not a necessary step.

Third, I highly recommend browning the butter.  This will add a complexity to the flavor, and since you have to melt the butter anyhow, you might as well do it on the stove and make the house smell like magic.

Fourth, I would also highly recommend sifting your dry ingredients into your wet ingredients to prevent lumps.  I did not do this the first time and I think the texture is far better when you sift.  This will also help you in that you won't have to stir as much.

Fifth, this is a nit picky thing, but I always mix salt with sugar in my wet ingredients, as I think this makes the distribution of flavor better than having salt be with the dry ingredients.  I never know why recipe writers always insist on coupling salt with baking soda/baking powder and flour.  Also, I always used salted butter.  Yes it adds more salt, but I think it also adds more flavor.  I almost never use unsalted butter and if I do, it's normally because I ran out of the salted kind.

Saturday, August 24, 2013

Mini Cherry Pies


Confession: I have never truly made pie dough from scratch.

I love to bake, but my thing is normally cookies and cakes.  If I made pies or tarts, normally I just buy a grocery store crust.  Is that terrible?

But then the other week I saw a recipe for mini cherry pies that you can make in a muffin/cupcake tin!  The recipe, which, of course, involved making pie dough from scratch, seemed delicious, and sweet dark red cherries happened to be sale at the grocery store, so it seemed like good time to try the recipe and to try my hand at making pie dough from scratch.  Also, miniaturizing desserts is a great way to make them easy to pack for lunch or even to entertain (no messy cutting and serving)!


I know cherry season is ending soon, but this recipe is perfect, even with frozen cherries or end-of-season bruised/not-so-beautiful fruit.  The cherry, vanilla, and rum flavors are classic, and this pie dough was a cinch to make and tasty just as flaky and perfect as I hoped it would.


Monday, July 15, 2013

Cronuts - a food trend that the Foodie Next Door had to try

 Anyone who keeps track of food fads or reads the news regarding trends in New York City (or in the USA even) should know about Dominique Ansel's Cronuts.

The cronut craze has literally swept the nation.  Bakeries in big cities like LA, DC, and Chicago are taking note of the huge success of this new baked good and selling knock-off creations called doughssants, cray-nuts, and doissants.

So what are these things?  They are hybrids: half-doughnut, half-croissant.  A flaky, deep-fried pastry filled with sweetened cream, rolled in sugar, and glazed.  And apparently something about these creations has them in high demand because even though they are selling at $5 a pop, people have been lining up outside Dominique Ansel Bakery in Soho for up to 3 hours to wait for theirs.  The cronuts are so popular that people start waiting around 5 or 6am and the bakery sells out each morning within a couple hours of opening, even though each customer is limited to two cronuts.  Cronut popularity is such that people have started scalping theirs for $20-40!

Still on vacation and now happily settled into our new apartment just 20 minutes outside of Manhattan, B. and I decided to give up some precious sleep one morning and see just how good these things could be.  We woke up at 4:45am, took the train into the city and groggily got in line.  We decided to do this on a weekday, just to make sure we weren't standing in line just to have them sell out before we got to try one.  This ended up being a very good plan, because when we got in line, there were only about 20 people or so in front of us.  The line quickly got longer though, and stretched around the corner and down the block as it got closer to opening time.

When the doors opened at 8am, Dominique Ansel himself came out and allowed a wave of people inside.  Of course, as luck would have it, B. and I were at the exact cut off point and so we had to wait outside.  But then a girl from the bakery came out with a tray of fresh, hot madeleines.  Each person in line was allowed to have one.  It was so nice, especially after a long wait.

At last, we were allowed inside.  The line moved quickly and efficiently, as the cronuts are pre-boxed and almost everyone knew exactly what they wanted.  Because of the new limit of 2 cronuts per order, B. and I split up so that he could order two and I could order two.  I was afraid this might be a bit excessive, especially since that total order came to $21.78 (post-tax), but in the end I'm glad we got that many.


There was space at a table in front, so we sat down to eat ours right away.  B. saw how good they looked and declined my offer to split one, saying that he wanted his all to himself.

The first bite immediately showed the complex texture of the treat.  The fried, sugar coated exterior gives ways to a pleasantly chewy interior, much like a yeasted doughnut, except that it has an airy quality to it.  On the second bite, I got some of the filling - vanilla crème and blackberry jam.  The jam had some acid to it, which perfectly balanced the sweet and fat of the cronut.  The glaze was very sweet (clearly the ingredients were mostly sugar and very little actual flavoring) and a bit of an overkill since there was already a sugar coating.  The cronut is very filling.  You can definitely feel the calories from the butter of the dough and the fat from the frying.  If it hadn't been for the very long wait, I don't think I would have been able to eat an entire one.

Overall, we both enjoyed our cronuts, but the price tag is a hefty one.  I'd never pay more than about $2.50 for a croissant, and a doughnut needs to be really good for me to consider it worth $3.50, so this cronut cost significantly more than I'd be willing to pay for its parents.  The cronut also didn't have the flakiness I would expect from something that is supposed to be half-croissant.

Would I like to eat one again?  Sure.  Would I like to wait 3 hours in line and pay $5?  No, thank you.


Dominique Ansel Bakery
189 Spring St (between Sullivan & Thompson)
New York, NY 10012
Tel: 212-219-2773

Hours: 8am to 7pm (Monday to Saturday)
            9am to 7pm (Sunday)
Closest subway stops: Spring St (C-E) or Prince St (N-R-W)

Friday, March 15, 2013

No Bake Matzo Brittle (aka Chocolate Caramel Matzo)


This recipe really speaks for itself.  It's matzo covered in a layer of delicious caramel that snaps satisfyingly, just like a brittle should, and that caramel is covered in a thin layer of chocolate.  There can even be sea salt or chopped almonds sprinkled on top.

This is a fantastic snack, an easy dessert to make without turning the oven on, and it's great for entertaining.  Given that Passover begins this Monday the 25th, I thought it was an appropriate time to share this recipe.  I'm not Jewish, but I grew up with a good number of Jewish friends, so matzo  (note: singular is matzah) is a familiar thing to me.  I've had matzo brownies, matzo chocolate chip cookies, and matzo ball soup (which I love), but this is by far my favorite way of using matzo.  Of course, if you don't have any matzo on hand, you can also make this recipe with saltine crackers.

I feel like I must say, before sharing this recipe, that the photos really don't do this justice.  Melted chocolate and caramel are hard to capture with a digital camera in a way that captures all the beauty of the two.


Thursday, December 20, 2012

Mexican Hot Chocolate Brownies


I don't like brownies.  Really.  I don't see the appeal in them.  Most brownies just taste like chocolate and flour, and I don't mean that in a good way.  I find 99% of brownie recipes to be one note. They are dense, and taste of cake-y chocolate with no real character and after about one bite, they get incredibly dull.  If a dessert requires a cup of coffee, a scoop of ice cream, or whipped cream in order to be good, then it is not a good dessert.  Good desserts should be able to stand on their own.

So it goes without saying that I rarely ever make brownies, yet here I am, posting about a brownie recipe.  I like this recipe so much the first time I made it, I had to make a second batch the next day to be sure that it wasn't a fluke.  This is no mistake: this recipe is gold.

The brownies that this recipe turns out are just sweet enough, but not at all cloying.  You don't need coffee or milk or ice cream to make these good.  In fact, I've eaten them for breakfast.  The espresso in the batter heightens the deep flavor of the dark chocolate, and the cinnamon adds a warm background fragrance.  Best of all are the lingering notes of black pepper and cayenne pepper.  They add just enough heat to makes your tastes buds light up, but it isn't at all overwhelming.  In fact, I find the spiciness rather comforting.  Of course, you can adjust this to your liking.  The first time I made this recipe, I omitted the cayenne pepper but used freshly ground black pepper.  It was delicious.  The second time I used both.  Also delicious.  Seriously, I have no complaints about this recipe.

If you're like me and you don't normally make brownies, I beg you to make an exception in this case.  Or if you the type of person who loves brownies, I highly suggest trying these.  The recipe is very easy to make.  I did this in a food processor for easy clean up, but you can also make this with a standard mixer.

Happy Holidays all!

This pictures speaks for itself.  Make these brownies.

Tuesday, November 6, 2012

Election Day Chocolate Cupcakes with Salted Caramel Frosting


My fiancé once pointed out to me that although I love to cook, I have nearly no savory recipes on my blog; instead, I tend to write exclusively about sweet recipes for baked goods.  The reason for this is mostly that when I cook, I don't use recipes.

For example, I made a Vietnamese-style duck soup (mi vit tiem) the other night with dried lily bud flowers (kim cham), Chinese dried apples (tao tau), ginger, and orange peel.  It was the perfect thing for the cold weather we're having here in New Jersey.  But I couldn't tell you how much water was in it or how much soy sauce I put in the broth or how much ginger I used.  I just know that I tasted along the way and the end product was delicious.  Also, I made the soup with duck bones and I seriously doubt that you, my dear readers, keep Asian marinated duck bones in your fridge that are just waiting to be made into a delicious stock.  In fact, 90% of the ingredients that went into that soup are things that I'm willing to bet no one who isn't Vietnamese keeps in their kitchen.  In fact, my own mother, who knows how much I love this soup, doesn't always keep all the ingredients for it on hand.  Long story short, the point it, I do make savory foods.  I just don't know how to write about them, since I don't have recipes for a lot of what I make.

I do, however, have a lovely recipe for a chocolate cupcake with salted caramel frosting.  And I promise you, this salted caramel frosting is a breeze to make.  This caramel never fails, never cracks, never breaks... it is perfect.  You don't even need to keep your eye on it the entire time you're making it.  I've probably made it close to a dozen times in the past two months and it's never gone wrong.


I made these cupcakes to eat as my friends and I watch the election results, and I'm hoping they will be celebratory cupcakes.  Of course, since it'll probably be too late for you to make these in the spirit of the election, they also work well as birthday treats.

This recipe makes 36-42 cupcakes, or two 10-inch layers, or three 8-inch layers (if you're the cake making type).  You can also mix this combination up and bake 12 cupcakes and two 8-inch layers, or so on.

The cupcakes are the perfect level of chocolate-y.  They are flavorful, with a moist and delicate crumb, and the salted caramel frosting is the perfect ooomph to elevate everything to perfection.  Unlike other cupcakes, these don't taste like brownies.  By that, I mean they aren't overwhelming fudge-y in a way that makes you feel sick after three bites.  And the combination of vanilla, coffee, and rum in this recipe makes this all just irresistible.

I recommend making these cupcakes a day in advance.  Frost them and then keep them in a covered container in the fridge.  The flavors seem to just get better on the second day.  The chocolate is more intense and the nuances of vanilla and coffee seem to meld in a very lovely way.

Thursday, June 21, 2012

My Short List of Recipes for the Summer

Now that it is officially Midsummer's Day, I feel like I can share with you my short list of my favorite recipes for the summer.  Personally, I think the best summer recipes are ones that are light, refreshing, and generally served cool or cold, like carpaccios or fruit salads.  Summer is also the time for grilling and for eating popsicles.

No, this isn't a popsicle, but my popsicles
didn't photograph beautifully and they
tasted too good so I stopped taking
pictures and ate them instead.  So here is a
yogurt and honey parfait. Almost the same thing,
just not frozen.
Let's talk about the popsicles first.  I am a big fan of frozen treats.  I like ice cream, gelato, and sorbets.  (I even enjoy eating frozen peas, but that's probably not universally considered a "frozen treat," so we don't have to focus on that.)  I really enjoy reading recipes on making ice cream or sorbets at home, but I don't have an ice cream maker and I don't think it would be a good idea for me to invest in one simply because I don't want to give myself diabetes.  That said, the idea of making my own ice cream at home is still fun.
Unfortunately, without an ice cream machine you'll have a hard time getting the dreamy, light, and creamy texture of store bought ice cream, but you can get something close to it.  So what is summer recipe #1?  Frozen yogurt and honey popsicles.  These are deliciously easy to make.
  1. Get some store bought plain yogurt (normally I buy mine in 32oz plastic containers).  Open it, stir it, close the lid and come back in a few hours, or better yet a day.  The yogurt will probably have separated a little bit, so that there is some water on the top.  Carefully pour that off.  You can do this a few times, or you can move on to the next step.
  2. Pour in some honey.  I normally do about 1 teaspoon for every quarter-cup of yogurt.  Blend the yogurt and honey with a hand held mixer, or some vigorous whisking.
  3. Pour the yogurt into little plastic/paper cups.  You can add some chopped up peaches or cherries if you'd like.
  4. Put a plastic spoon into the middle (this will work as the popsicle stick).  I find that the best popsicle molds are actually individual yogurt cups (e.g. Activia) which have been washed and saved.
  5. Freeze for 4-6 hours, depending on the size of the popsicles you are making.  To remove the popsicles from the mold, just quickly run some hot water around the outside of the mold.

Another favorite recipe of mine is roasted eggplant, tomato, bell pepper, and avocado salad.  You grill/roast the vegetables (everything except for the avocado), and then you serve the salad chilled with a deliciously easy dressing.  I eat this salad as a full meal, but it also tastes great with chicken, steak, ribs, you name it.  I also love that you can prep the ingredients in one day, make the salad another day, and eat it two days later and everything still tastes amazing.


My third favorite summer recipe is my mom's zucchini "carpaccio" with avocado, shrimp, and pistachio (recipe and pictures coming soon!).  This recipe just thinned sliced zucchini and avocado dressed with lime juice and olive oil.  Add some grilled/sauteed shrimp and some crushed pistachios, and you have a beautiful harmony or flavors that'll quickly become your go-to summer lunch, especially since this recipe tastes better after some time "marinating" in the lime juice and olive oil.

I have other favorites that include lightly sauteed sweet corn, potato blinis with salmon, and a melon/cantaloupe salad that I've already written about, but we've got the whole summer ahead of us.  For now let's just enjoy the peaches, nectarines, and cherries that the farmer's markets have given us.  There's plenty of time for sharing recipes.


Friday, June 8, 2012

The Best Banana Bread You'll Ever Taste

This is the stuff, my friends.  Look at it.  Moist, dark, full of flavor.  Well, you can't tell the last thing just by looking at the picture, but I assure you it is true.  This banana bread has rum, dark chocolatecaramelized sugar, and deep vanilla and warm spice tones.  What more could you ask for?
It is delicious sliced cold with a glass of milk for breakfast.  It tastes good fresh out of the oven, and it tastes even better on the second day, once the flavors have really melded together in the fridge.  This is breakfast, lunch, afternoon snack, dessert... heck, you can have this for dinner.

One-quarter cup of rum and one full tablespoon of vanilla extract go towards making this the most flavorful banana bread I've ever eaten.  The salt also rounds out the flavor of the banana and the dark chocolate chips that are studded throughout the bread elevate this to the status of heavenly.

The first time I made this recipe I actually forgot to count how many cups of flour I had put into the batter so I wasn't sure if it was 2 cups or 3 cups.  The batter seemed liquidy in the pan, but when it finished baking, it had a lovely bread-pudding texture that I absolutely adored.  The second time I made this, I actually used the right amount of flour and I got a true banana bread.  I actually prefer the bread-pudding results, but it's a personal preference thing, so both ratios are included below.


Monday, April 23, 2012

Sweet Paris - Ladurée versus Pierre Hermé

Two weeks ago (has it been two weeks already?) I flew to France to see B., to meet his family, and to soak up the sweetness that is Paris.  Of course, when I talk about the sweetness that is Paris, I do mean that rather literally.  I have a long-standing love for French pastries — a love that almost matches my love for B. — and I don't deprive myself when I can get them.  In fact, I just counted, and during the six days that I was in Paris, I ate 12 different pastries.  Twelve.  And I don't even think of that as a lot.  A visit to Paris is so synonymous in my mind with eating pastries that I don't think of it as anything to write home about; most of the time I don't take notes or pictures, and all my friends and family know that I always take pictures of my food.  But with French pastries, either because I grew up seeing them all the time or because I don't want to wait the extra 20 seconds to take a decent picture, I just buy them and I eat them.  But there are two places in Paris that are too famous to act blasé about: Ladurée and Pierre Hermé.


I first went to Ladurée when I was thirteen.  This was many years ago, before the name was well-known in the States.  It was a place that my parents had read about and they decided to take their two daughters there.  We sat down in the salon and oohed and aaahed over everything as we ate the pastries and drank the tea.  It was wonderful.  The service was friendly and attentive and everything was delicious, but I haven't been back since.  Ladurée is good, but pastries everywhere in Paris are good, and I never really got into the macaron food fad that everyone else seems to be following.  Sure, I enjoy the delicate little rounds, but I'd rather have some good foie gras.
Recently, however, when my boyfriend came to visit, he brought two boxes of macarons for my family from Ladurée, sweetly packed and carried across the ocean for us.  My sister and my parents were touched by his gesture, and it piqued my interest in going back to the shop.
Ladurée, which was founded back in 1862 (a fact that is printed on almost everything that bears their name, so I think they're rather proud of it), is often credited as being the first place in which the modern-day macaron was made.  The modern-day macaron I speak of is a tiny "cake" (if one can even use that word) made of egg whites, almond flour, and sugar baked into small airy rounds that are smooth, crisp, and soft all at once.  Two of these small "shells" are joined together by a ganache or jelly-like filling in the middle.  Flavors can range from raspberry and chocolate to olive oil or thyme.


I first visited Pierre Hermé two summers ago.  I had heard much about it for years before then, but I just hadn't taken the time to visit.  Pierre Hermé (the man) is famous in the gourmet pastry scene for his bold, sometimes risky, flavor pairings, including the very famous Ispahan, a macaron that combines raspberry, lychee, and rose together so successfully that it has been copied everywhere, including at Ladurée.
My sister and I went there together, and we didn't try any of the macarons (again, I was never big into the macaron craze), but we bought the Ispahan and a dark chocolate mousse pastry.  I remember that the Ispahan was good, but I don't recall being blown away by it.


But I am no longer eighteen and it has been a long time since I was thirteen, and so I had to go back.  I wanted to do a taste test between the two places and to compare the macarons at Pierre Hermé with those at Ladurée.


At Ladurée I bought several macarons, for 1€70 a piece.  Boxes are more expensive, but are a good choice if you are traveling with your macaron, as the paper bag they give you otherwise provides absolutely no protection.  After I had paid, I was offered a free raspberry marshmallow macaron to try, as it was a new flavor that they were trying to promote.  I accepted it from the silver platter upon which it was offered to me (by a man in a suit wearing white satin gloves, no less), and ate it as I walked down the street to the metro.  It was overly sweet and the flavor was one note.  I could sense the marshmallow from the filling, but the raspberry flavor was lacking, and I felt like it needed some acid or salt to balance out the cloying sweetness.  It did, however, have a lovely texture; the shell was airy with a crisp exterior that gave way to a soft interior that had just the slightest bit of chew before giving away to a melt-in-your-mouth kind of "crumb" that is very distinct to a well-made macaron.
The flavors I bought to try (pictured above, on the left) were salted caramelpistachio, cherry, and fleur d'oranger (orange flower blossom).  I took them home and split them that night with B. for dessert after dinner.  The salted caramel was good, sweet, but balanced and very well flavored.  The pistachio wasn't quite as strongly perfumed, but it was enjoyable.  I didn't get as much of a cherry or orange blossom flavor, respectively, from the last two macarons, but they were both pleasant to eat, albeit a little on the sweet side.  B. and I agreed that the macarons at Ladurée were good, although more delicate flavors weren't captured as well as strong flavors were.

At Pierre Hermé, I also bought several macarons.  Here, they charge for the macarons per piece until you buy more than four; then they charge you by weight.  The flavors here were more unique; I suppose Pierre Hermé finds single-flavored macarons to be too easy, and he's a man who likes more of a challenge.
At the top left is the "Eden", a macaron that combines saffron, peach, and apricot.  I was very curious and hopeful about this one, but I did not enjoy it at all.  In fact, to be honest, I didn't even want to swallow the bite that I took, that was how unpleasant I found it, and I am not one who normally disdains odd flavor combinations.  B. agreed with me that it was not good.  In the middle on the top row is the "Mosaic" macaron, which features a vanilla macaron and pistachio filling flavored with cinnamon and morello cherries.  Neither of us were really crazy about this combination either.  The filling had an odd and unexpected flavor of coconut, and I couldn't sense any cinnamon or pistachio.  All the way to the right is the "Mogador" macaron, which features milk chocolate and passionfruit.  I thought this was the best one.  Both flavors were strong and they worked together well.  Unlike the other macarons, in which the flavors had seemed to be fighting with each other, these flavors were complimentary.  On the bottom left is "infiniment caramel" which features salted caramel (fleur de sel).  This was good.  It was much heavier on the salt than the salted caramel macaron at Ladurée.  Though I preferred this version, B. preferred the one at Ladurée.  Lastly, the pale macaron on the bottom was "infiniment jasmine", which was supposed to have flavors of jasmine flower and jasmine tea, but they did not come through in the macaron.
I was very disappointed by Pierre Hermé after this tasting, and B. told me that we should have ended the taste test with Ladurée to finish on a good note, since neither of us particularly enjoyed the lingering tastes we had in our mouths of the macarons from PH.


I also compared the two versions of the Ispahan.  This raspberry macaron with a rose-lychee filling is originally a creation of Pierre Hermé.  Ladurée (on the right/on top) sells it for 7€20; Pierre Hermé sells it for 6€90 (left/lower image with the "PH" sticker).


Though they look almost identical, B. and I agreed that Ladurée makes the better version of the Ispahan (pictured on top)their re-creation is preferable to the original.  Their macaron shell was texturally better and their filling was more flavorful.  Pierre Hermé's version was good (better than his other macarons), but the macaron shell was not well made.  It was too thin and the texture was odd; the crispy shell exterior gave way to an interior that was too dry and didn't have the light crumb that I expect from a good macaron (pictured on bottom).  The filling was also too sweet and didn't have enough flavor, though large pieces of lychee were generously mixed in.  While the flavor combination in both cases was good, Ladurée had better execution.

It saddened me greatly to see Pierre Hermé fail so terribly in comparison as I had expected it to be a closer call, but now I can say with no hesitation that if I had to pick, Ladurée is my preference.  I can see why people are always lining up in Paris and NYC to buy the sweet creations.

Though Ladurée has many locations worldwide, if you find yourself in Paris, my recommendation is to go to the one on 21 rue Bonaparte as it is not as crowded as some of the other locations (the one near Madeleine often has a very long line, since it is in an area frequented by tourists) and it still has a salon if you want to sit down for tea or food.  For NYC locals, there is a store at 864 Madison Avenue, however from what I've heard, there is always a line.

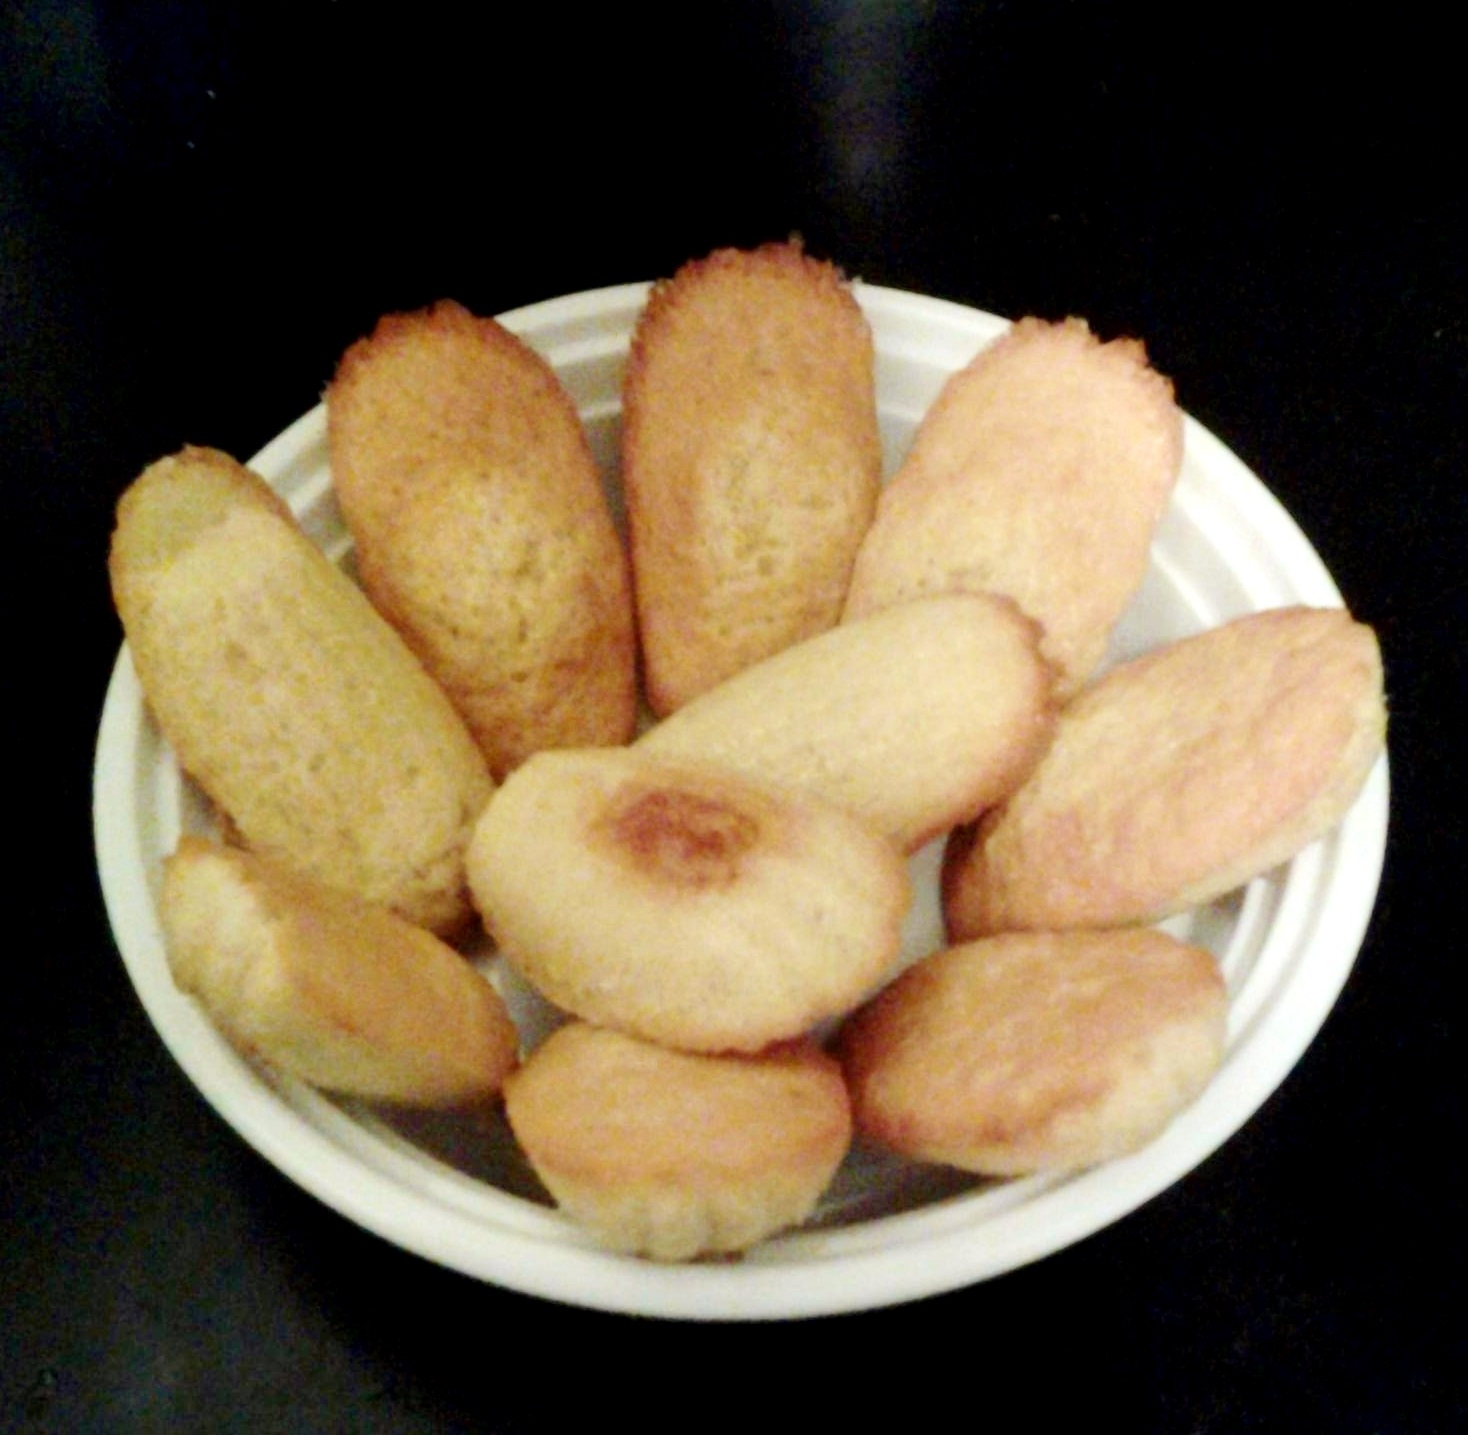
Finally, one last word of advice: take care when traveling with macarons.  They smush rather easily.

Monday, February 13, 2012

A Light Valentine's Day Dessert - Ginger Pear Granita


Valentine's Day is approaching and I know for some people this carries with it the pressure to create a magical day for their significant other.  If this sounds like your situation, or if you're just looking for a quick, easy and fairly healthy dessert to make, I'm glad you stopped by.

I've always liked the idea of a granita.  A granita is essentially a classy version of a slushie that you make by hand.  The only slightly annoying thing about making granitas is that you can't forget about them while you're making them because in order to make a granita, you need to scrape at it with a fork or knife every hour or so to prevent it from freezing into one hard block of ice.  But I have found an easy solution to this very irritating problem: use a carbonated beverage and mix it with fruit.

The combination of ginger ale and pears chunks in this granita prevent it from freezing into a chunk of ice and also make this a refreshing dessert.  The most important thing now becomes finding good ginger ale.  I cannot stress enough how vital this is to the recipe's success.  Normal grocery store ginger ale does not taste like ginger.  It is simply sweet carbonated water.  That will not do.  Go out and buy the real stuff.  Boylan's makes a good ginger ale that uses real cane sugar and Reed's makes a deliciously spicy ginger ale that is my new favorite soda.

From there, all it takes is four easy ingredients (or three if you feel like omitting one) and you've got a palate cleansing, refreshing, and healthy dessert that takes absolutely no time to make.  I also like this dessert because it is light and almost ethereal in quality.  The frozen ginger ale bubbles a little bit as it melts in your mouth and because there is no cream or fat in the dessert, it doesn't weigh you down.  I know this a bit different than the standard chocolate and strawberry desserts that people normally associate with romance, but let's be frank here: who feel sexy after a heavy dinner of creamy, fatty foods?  And besides, ginger is an aphrodisiac and pears are sexy.


Now if you're wondering why there's only one glass pictured (especially considering the fact that this is a Valentine's Day dessert), well, it's because I only own one martini glass.  I once had two, but then, sadly, I broke one while washing dishes and I've never felt the need to go buy more given that I neither drink martinis nor thrown swanky parties at which my guests would be drinking martinis.  Instead, my martini glass tends to be used to dress up yogurt parfaits, chocolate mousse, and, now, a granita.  Also, despite posting a recipe for a Valentine's Day dessert, I will not be making this tomorrow for my special someone so there is no need for a second glass.  Why is that?  Not because of a lover's spat, I assure you, but rather because balancing a long distance relationship in which one partner works on one side of the Atlantic and the other attends medical school on the other side of the ocean means not seeing each other for Valentine's Day.  But it's okay because I don't need a holiday to remind me to appreciate my sweet B. and he makes me feel loved regardless of what day of the year it is.  So I will have a single martini glass of this granita tonight and another glass again tomorrow night.  If you're single, come on and do the same.  After all, Valentine's Day is really just an elaborate excuse to enjoy good food and good company, and this granita qualities as both.

Happy [early] Valentine's Day, all.


Friday, February 3, 2012

Salted Caramel Cupcakes & Frosting

As a follow up to my post about salted caramel, I return with a recipe for salted caramel cupcakes and frosting.  That's right, take out a pen and start taking notes because this is what you're going to want to make for your next party.  Actually, this is what you're going to want to make tonight.  Because they are to die for.  Stop going to those expensive bakeries and paying $3 for one lousy cupcake; make this at home instead.  It will be better and cheaper and it will impress everyone around you.  Salted caramel cupcakes with salted caramel frosting.  Grab yourself a cup of milk and settle in for the night, because this is the life, my friends.

These cupcakes don't take that long to make (the longest part, besides the baking and waiting, is making the caramel) and they require no special ingredients, but they taste phenomenal.  They are great gifts or dessert items for potlucks or dinner parties.  They are also the type of thing that is easy enough to throw together that you can justify baking it for yourself.  So why not?  The world could use a little more salted caramel love.

These cupcakes really do taste like they have salted caramel in them, which is exactly the quality I wanted.  I didn't want them to taste like sweet vanilla cupcakes; I didn't want to have to fill them with caramel sauce.  I wanted cupcakes that I could eat alone, on their own, and think mmm, salted caramel.  And that's exactly what this cupcake recipe achieves.  It is perfect on its own, it is delicious with milk, it is decadent with frosting.
The recipe has parts and pieces taken from many different recipes I've read online, but ultimately I wrote it based upon what I thought would make the best cupcake in terms of a light, moist, and flavorful crumb.  The one slightly uncommon ingredient on the list is "pourable" yogurt, but that's because I happen to have on hand Organic Valley's yogurt which comes in a bottle that you shake and pour.  I thought that yogurt's texture and viscosity were perfect for the recipe, but if you can't find something similar, regular yogurt or buttermilk will work just fine.


 As for the frosting recipe... I've said it once and I'll say it again: I don't do frosting.  With the exception of the Bailey's Irish Cocoa Frosting that I made once during an inspired moment, I think frosting is fairly overrated.  If a cake or cupcake is good enough, it shouldn't need to be covered in frosting.  Also, most frosting is just a lot of butter and sugar, which doesn't sound that great to me.  Except that this frosting tastes like heaven, if heaven were made predominantly of butter.  This salted caramel frosting is the perfect balance of sweet and salty, and it is creamy in a decadent way that manages not to make you feel gross, even when you eat a spoonful straight out of the bowl, on its own (not that I'm speaking from experience or anything).  And the frosting recipe obviously doesn't have to be for just these cupcakes.  It would go well with any cupcake recipe. You can even eat it with slices of apple or pear.

Salted Caramel Frosting, aka the only frosting recipe you need from now on

So really, I don't think I need to do any convincing, right?  Because you must know that this recipe is a crowd pleaser.  And when I say crowd, what I really mean is that you'll make these cupcakes, frost one, try it, and decide not to share with anyone because these are that darn good.

Food is love?  Salted caramel is love.


Sunday, January 29, 2012

Salted Caramel Sauce


I have a serious relationship with salted caramel.  I love it.  And true love lasts a lifetime.
When I go to my favorite gelato place in Paris, I always pick salted caramel as one of my flavors.  Always.  The summer of 2010 I probably went to that shop at least 7 or 8 times within the span of a couple weeks, and I stayed loyal to my salted caramel.
During the first few months of medical school when I studying for exams, my stress food was Bequet sea salt caramels.  I could go through 3 to 5 in a day.  When B. came to visit in September, he recognized the importance of salted caramel in my life and he bought me a ridiculous amount, to get me through my sleepless study nights.
At Co Co Sala, a restaurant/lounge in DC, even when I go to get drinks with my friends or my sister, I order the [virgin] salted caramel hot chocolate along with whatever cocktail I'm having for the night.

So as you see, salted caramel is very dear to me.  And yet, for all this, I never made my own salted caramel.  I never thought to experiment.  Honestly, it was because I think making caramel can be a hassle.  I've made caramels that cracked before, and I take it personally when that happens.  Honestly, it's a little heart-breaking.  You put all this love into coaxing a little pot of sugar and water to cook into something lovely and then it seizes into huge sugar clumps that are impossible to dissolve and that make you want to cry.  Heart breaking.

Clearly, I get too emotionally involved when it comes to food.

But no!  I shall be brave.  I shall put my heart on the line for true love.  It is worth the risk.  Salted caramel, you shall be mine.

It was a combination of things that led to this.  First, I found a very good deal on some beautiful grey sea salt (coarse sel gris de Guérande if you're curious).  Then I had some extra heavy cream on hand, leftover from making cheesecake.  And, of course, I had a craving.  I had no more salted caramel on hand and I wasn't going to go out and buy some.  So I decided to try.  And now I can't believe I waited all this time to discover this.

If you only make one caramel recipe all your life, let the recipe below be it.  Really.  I know caramels can be intimidating, I know salted caramel can sometimes seem like it's not worth the hype, I know I have a habit of telling you readers you have to try the recipes I post here.  But honestly, this is so worth it.  It will only take a few minutes and four simple ingredients, and when I say "ingredients," one of them is water.  That's it.  And then bliss, love, and happiness will be all yours.

You can eat this caramel sauce with everything.  Apples.  Crackers.  Pears.  Vanilla ice cream.  This may sound crazy, but I even used it to glaze some ribs the other day.  Tasted fantastic.  You can also use this to make amazing hot chocolate.  Just stir a spoonful or two into a glass of hot milk and cocoa.

And.  And.  If you feel so inclined, you can use this sauce to make an incredible salted caramel frosting.  Yes.  I'm going to hold off on sharing that recipe for you just yet (because it's also going to be accompanied by a recipe for salted caramel cupcakes), but let me tell you this: oh. my. god.

C'mon, how can you resist?


Sunday, January 22, 2012

Salted Caramel & Chocolate Mousse


It's been a while since I really posted here.  Life has been very crazy lately and it hasn't involved much sleep.  The other weekend, for example, I slept a total of maybe 4 hours.  Thank goodness sleep debt isn't financial debt, otherwise I'd have serious problems.

Anyhow, because of how things have been, I've had a recipe on file that I have wanted to share with you for weeks.  So we have to backtrack a little bit.  A month ago, I went to a potluck dinner party to, um, celebrate Christmas.  [Whoops!  Sorry this took so long to share!]  It was among a big group of friends, and as usual I wanted to go with a dessert.  I thought about baking something, but everyone always does cookies or cupcakes and, having recently made my first ever salted caramel frosting (more on that later), I was interested in trying a recipe with salted caramel and chocolate.  Who doesn't like that combination?

Because I love chocolate mousse, I decided to do a recipe with chocolate and salted caramel layers.  The salted caramel mousse was my own recipe, completely written from scratch.  I had looked up salted caramel mousse recipes online, but they all involved gelatin or they were chocolate and salted caramel (i.e. the two flavors were mixed and not kept separate).  I don't have powdered gelatin and I wasn't interested in going to store to buy some, and also I had vegetarian friends who would be coming to the party and so using gelatin didn't seem too nice.  Yes, agar agar could have been an option, but again, I didn't want to go to the store.  So what is it that they say?  Need breeds ingenuity?  I decided to get creative.

I based the salted caramel mousse recipe off of other recipes I read for fruit mousses and for Italian meringue, so it used egg whites, whipping cream, and hot caramel.  It turned out fairly well considering the fact that this was my first time completely making up a recipe.  Granted, it wasn't quite as "mousse-y" as it should have been -- and by that I mean it could have been thicker -- but no one complained.  In fact, many people at the party have been asking for the recipe since then, and so my apologies to them (if anyone's reading) for taking so long to post this.

This combination of salted caramel and chocolate is a real winner, and while it does take some time to make both of these mousses and layer them into little shot glasses, the delight you get from people who see these and try them makes it absolutely worth the effort.  I forgot to count exactly how many little shot glasses I was able to make, but suffice to say it was enough for a party with more than 20 people.  For anyone about to entertain, I would absolutely recommend this as a dessert.  It's easy to make ahead of time and it's perfect for any and all occasions.  The recipe can be fairly easily scaled up or down as well, based upon how many you plan to serve, and any leftovers still taste delicious the day after.  Enjoy!