Showing posts with label classics. Show all posts

Wednesday, August 19, 2020

Amish Friendship Bread

 During high school, this recipe made the rounds with all my friends' moms.  It was called Amish Friendship bread, and it involved this milk, sugar, flour starter that sat on your counter, got fed occasionally, and then got baked into this delicious cinnamon "bread", which really was more of a cake, and inevitably got shared with everyone during whatever events it was that required moms to bake.

Eventually, everyone got tired of feeding their starter and the "bread" disappeared from my life.  But I still remembered it.

Then, magically, during this pandemic, it resurfaced in my Buy Nothing groups (which, if you haven't heard of them, I encourage you to google it and then join your local one).  I got my hands on a starter and I just baked off my first batch this weekend.  It was love all over again.

I had a heck of a hard time finding consistent recipes, so here's me using this blog again for my own record keeping.


Day 1: Do nothing. This is the date that you receive the bag of starter (or the date that you make your own batch of starter / Day 10). Squish the bag.
Day 2: Squish the bag.
Day 3: Squish the bag.
Day 4: Squish the bag.
Day 5: Squish the bag.
Day 6: Add to the bag – 1 cup flour, 1 cup sugar, 1 cup milk.  Squish the bag.
Day 7: Squish the bag.
Day 8: Squish the bag.
Day 9: Squish the bag.
Day 10: Baking/Feeding Day.  Pour the entire contents of the starter bag into a non-metal bowl and add: *1½ cups of flour, 1½ cups of sugar, 1½ cups of milk.  Set aside any starter you will bake with.  Divide the remaining starter into 1 cup portions in separate ziplock bags.


Amish Bread Recipe (Day 10 Baking Instructions)
1 cup starter
3 eggs
½ neutral oil
1 cup sugar
1 cup milk
2 teaspoons cinnamon
1 teaspoon vanilla
1 ½ teaspoons baking powder
½ teaspoon baking soda
½ teaspoon salt
2 cups flour
Optional: 1 large (5 ounce) box vanilla instant pudding mix (just the dry mix)
Topping: 1/4 cup of sugar + 1 teaspoon cinnamon

Combine the ingredients in the ways normal people combine ingredients for baking.
Top with sugar mix.
Bake at 350F for 50 minutes.

This made two not very tall loaves for me, so next time I will put all of this batter into one loaf pan.  Also this tastes great with berries baked into the middle!

*Note about Day 10: This is what I read online and it seemed like too much stuff.  So I experimented with only giving it 1 cup of each.  Now I'm waiting to see if I've messed up.

Tuesday, April 4, 2017

Chicken Liver Pâté or "French Peanut Butter"

When I was growing up, my family would very frequently go to France for the summer.  It was my birthday, the French independence Day, and my maternal grandparents and maternal aunt and cousin lived in Paris.  My parents and my sister and I would rent a room or two in the apartment building where my grandparents lived, and we spent glorious days together exploring the city and eating good food.  There is still - and always will be - a fond place in my heart for the neighborhood of Marie des Lilas.
There was a butcher shop that sold pâté de foie and jambon and we often got this to eat with a baguette; the perfect breakfast.  (There was also milk and yogurt, jam and nutella, and always my mother's favorite President butter.)  For years, as a child it never occurred to me to think about what pâté was; I just thought it as the French version of peanut butter.  It was creamy, it was savory, it was delicious on bread.  Later on, I learned that it was essentially pureed liver.  Now, my mother had always seasoned and baked the gizzard and liver that came with whole chicken when we bought it, and I had no problem eating them when I knew what they were, so this mystery now solved didn't phase me in the least.  The only thing I learned that day was that I really loved eating liver.
I still have a tremendous fondness for pâté - I can rarely resist ordering it when it appears on restaurant menu - and eating it has a sweet sort of nostalgia for me in that it reminds me of my second home; the place of my childhood summers.
For some reason, it took me years to dare to try making it own my own.  I had some strange belief that it would be difficult, or that I would somehow be terrible at making it.  Instead, I've found it to be ridiculously simple and delicious when made at home.  The hardest thing is finding the chicken livers.


Chicken Liver Pate
1 large shallot
7-8 tablespoons of butter
approximately 1lb chicken livers, preferably organic if you can get them
1/4 teaspoon flaky salt
75ml (or roughly 1/3 cup) sweet white wine
dash of allspice
tiny splash of balsamic
freshly ground black pepper

Heat a knob of butter in a frying pan over a medium heat. Add the shallot and saute until caramelized.
Add the remainder of the butter and livers and cook until the livers are just starting to brown on the outside.
Add the wine, salt, allspice, balsamic, and black pepper and lower the heat to simmer lightly until the livers are no longer bloody when pressed.  They should still be pink on the inside.  If you're a little worried about undercooked livers (as I often am), cooking them a little longer doesn't change much.
Tip into a food processor OR use your handy dandy immersion blender to blend the livers.
Optional: (And I'll be honest, I really don't think it's worth the extra time or things to wash because it doesn't change that much of the texture)  Pass through a sieve into a serving dish.
Level out the top of the puree and chill for at least an hour before serving.  Delicious with fig jam or onion compote.

Thursday, September 8, 2016

Plum Torte Cake Buckle Heavenly Thing

Write this recipe down on a little sheet of paper and put it on your fridge.  That's what I did.  After I had already made it twice.  Now, that I've made it five times in the span of about two weeks, I can pat myself on the back and say, smart girl, you are.  This is one for the books.
This recipe - which I didn't even know was famous, but apparently, it is - is worth the hype, even if you didn't know it had any hype.  The plums (or peaches, or nectarines... really this is the easiest recipe ever to alter) bake up into these delicious sweet/tart pockets of jam that perfectly complement the light, fragrant, moist crumb of this cake.  Torte.  Buckle.  Heavenly thing, whatever you want to call it.


I can't say much more about this because I have already rambled on too much, but it's so easy to make, you might as well make two, because you're turning on your oven anyway, and you'll regret it if you don't.  Slice the extra one and store the slices in little ziplock baggies in the freezer.  Pull out anytime you need a snack or want to add an extra treat to someone's (aka your own, if you live alone, like I do) lunch.
Bring this to any birthday party, baby shower, picnic, or dinner party and it'll be a hit.  It's easy, elegant, and requires no additional side servings of whipped cream, coffee, or ice cream to be a hit.  But what the heck, it doesn't hurt to add them if you want.

As if typical of me, I took no pictures of this cake any of the times I made it, and now I am sitting in my apartment without enough eggs to make another cake in order to take a picture of it, so the lovely illustration above was done by yours truly for the benefit of whoever is reading this.  I hope you appreciate my artist representation.  If you want pretty pictures of this torte, go here, which the blog where I actually got the idea to make this recipe.


Heavenly Plum Thing
barely adapted from Marian Burro's recipe

½ cup salted butter, softened
¾ cup sugar
2 large eggs
1 teaspoon vanilla extract (optional, but why leave it out?)
1 cup unbleached all purpose flour, sifted
1 teaspoon baking powder
Pinch of salt  (not optional)
3-5 large plums or peaches, or 8-12 small plums (really just use your judgement here, this isn't hard)
1-2 teaspoons raw sugar (optional)
1 teaspoon cinnamon

Preheat your oven to 350F.
Cream the sugar and butter in a bowl.
Add the salt, eggs, and vanilla and beat well.  Let it all get very fluffy.
Add the flour and baking powder, and mix well.
Spoon the batter into a spring form of 8 or 9 inches.
Place the plum halves skin side up on top of the batter. Sprinkle lightly with cinnamon and raw sugar.
Bake one hour, approximately.
Remove and cool.
Eat.  Enjoy.
Repeat as many times as necessary.

Saturday, June 20, 2015

Zuni Cafe Chicken - an adaptation of the method


I have heard many stories about the Zuni Cafe Chicken: it's the best chicken in the world, it will change your life, you will never think of chicken the same way, etc., etc.  I honestly didn't understand the hype.  I mean, I enjoy chicken, but how amazing can a roast chicken be that it has an almost cult-like following?  Still, since I don't think I'll be traveling to San Francisco anytime soon and the recipe has been shared in the restaurant's cookbook and in the NY Times, I figured I could try it for myself.

Of course, I immediately ran into problems.  The original recipe calls for a small chicken, specifically, one between 2¾ to 3½ pounds.  I looked very hard for one in my grocery store, but the smallest I was able to find was a 4½ pound bird.  That's more than 25% bigger than what the Zuni Cafe recipe calls for.  I did my research, and it seems that the size of the bird is pretty integral to their technique.  A small bird can be roasted at a higher heat because there is a high skin/fat to meat ratio and the meat will also cook through in a shorter period of time.  So you need to do some changes to the recipe if you have a heavy chicken.

As for how things actually turned out?  Well, one of my friends scarfed down his plate in about 5 minutes, if that tells you anything.  In fact, he barely waited for me to finish carving the meat for my plate before he was digging in.  It was understandable though; the delicious smell of the roasting chicken had been permeating through the apartment long before the meal was ready, so we were both salivating.  The skin was blistered and golden; the meat was very moist and succulent; the pan juices were so good, they made me wish I had some bread to mop it all up.  It was a delicious dinner.  I would say this recipe is well worth the trouble.


Some basic tips if you have a large bird:
  1. Season for at least 2 days before serving.  I imagine 3 days would be even better, but I honestly wasn't patient enough to do this; I did 48 hours.
  2. Take a small knife and carefully, from the inside of the bird, slash the chicken breast on each side at its thickest point.
  3. Bring to room temperature before roasting.  This means taking it out of the fridge up to 8 hours in advance.
  4. Preheat your pan in the oven so that it gets really hot.
  5. Open the oven as little as possible.  Your bird needs all the heat it can get.
  6. Roast for about 40-45 minutes before flipping for the first time.  You want to see the top beginning to brown, not just yellow.
  7. Roast for about 20-25 minutes before flipping the second time.  You want to see the top really caramelized.
  8. Decrease your oven temperature down to 400F to finish cooking the bird, for another 10 minutes or more, as needed.  Use a meat thermometer to check for an internal temperature of 165F or stick a paring knife into the thickest part of the breast to see that the juices run clear.
The original recipe also calls for slashing the bird after it is done roasting to allow all the juices to drip out; these are used to make a sauce / gravy that is served alongside the roast chicken.  Now I like gravy as much as the average person, but I am strongly against draining meat of its juices.  So I didn't do this.  You'll have pan juices as it is, I think those are plenty.

One last recommendation?  Roast some vegetables at the same time as you roast your bird.  I particularly like roasted onions and carrots, which I tossed with some garlic and thyme.  The veggies only need to roast for about 35 minutes, given the high temperature.


Zuni Cafe Chicken
adapted from The New York Times

1 chicken, preferably under 4lbs, but if not, refer to my notes about larger birds
4 sprigs fresh thyme (or rosemary or sage if you prefer)
3 cloves of garlic, minced (my addition)
sea salt (about ¾ tsp per pound)

Remove and discard the lump of fat inside the chicken. Rinse the chicken and pat very dry (a wet chicken will spend too much time steaming before it begins to turn golden brown).
Season the chicken 1 to 3 days before serving.  Slide a finger under the skin of each of the breasts, making 2 little pockets, then use a fingertip to gently loosen a pocket of skin on the outside of the thickest section of each thigh. Push an herb sprig and some garlic into each of the 4 pockets.  Using about 3/4 teaspoon sea salt per pound of chicken, season the chicken liberally all over with salt and the pepper. Sprinkle a little of the salt just inside the cavity and on the backbone. Twist and tuck the wing tips behind the shoulders. Cover loosely and refrigerate.
Take the chicken out of the refrigerator at least 2 hours (but no more than 8 hours) before baking so that it comes to room temperature.

When you’re ready to cook the chicken, heat the oven to 475F.
Choose a shallow flameproof roasting pan or dish barely larger than the chicken, or use a 10-inch skillet with an all-metal handle (I used a skillet). Preheat the pan in the oven.
Wipe the chicken dry and set it breast side up in the pan (I actually set mine breast side down, whoops!). The chicken should sizzle.
Place in the center of the oven and watch for it to start sizzling and browning within 20 minutes. If it doesn’t, raise the temperature progressively until it does. Depending on your oven and the size of your bird, you may need to adjust the heat to as high as 500 degrees or as low as 450 degrees during roasting to brown the chicken properly. I went up to 500F on my gas oven.  Because my pan is only oven safe up to 500F, I did not continue to raise the temperature, even though I didn't really see browning until about 25 minutes.  According to the Zuni Cafe recipe, the skin should blister (this did not happen for me), but if the chicken begins to char, or the fat is smoking, reduce the temperature by 25 degrees.
After about 30 minutes (40 minute if you have a larger bird), turn the bird over; you want to see that the top side has browned and caramelized at least a little.
Roast for another 10 to 25 minutes, depending on size.  (At this point, I began to really see my bird crisping beautifully)
Flip once more to re-crisp the breast skin, another 5 to 10 minutes.  
If your bird is large, decrease the oven temperature to 400F and roast for an additional 10-20 minutes. Use a meat thermometer to check the internal temperature of the bird; it should be around 165F.  Or, use a knife to test the deep part of the breast meat; the juices should run clear.
Allow to rest for at least 10 minutes before cutting into it.  This allow the delicious juices to redistribute.  (It also prevents you from burning your tongue.)
You will still have some pan juices, which I high recommend you serve with the chicken so that you can dip your meat, veggies, bread, etc. into it.  Food this good should not be wasted!

Sunday, February 22, 2015

The Best Chocolate Chip Cookies

Sometimes, I get really carried away with cravings for specific foods.  Prime example: chocolate chip cookies.  Who doesn't like chocolate chip cookies?  And I know that everyone always talks about the "best" chocolate chip cookie, whether it best the New York Time's best chocolate chip cookie recipe, of the "world's best" chocolate chip cookie recipe, or maybe some famous chef's version of the best chocolate chip cookie recipe.  But for me, this one is it.
It's taken some tweaking and some little edits here and there, but this is now my constant go-to recipe, my version of "the best chocolate chip cookies."

A lot of the measurements are by weight, and seriously if you don't have a digital scale, stop reading this sentence right now and go get one.  Okay, are we all good?  Because digital scales will change the way you bake.  First of all, measuring your ingredients by weight is far more accurate and allows for more precision in baking.  One hundred grams of flour will always be one hundred grams.  But one cup of flour on one day might be more than the next day, depending on how well sifted the flour is.  So please, use a digital scale.  Also, less things to wash!  Just place a bowl on your scale, zero it, add one ingredient, zero it, add your next ingredient, and so one.  Easy peasy.

Now about the actual recipe: it has molasses and brown sugar which makes it chewy, it has just enough depth from whole wheat flour (although you can ditch this if you want and just use the all purpose), it has just enough salt, and these cookies taste delicious even when you bake them the same day that you make the dough.  I stopped believing that was true of cookies for a while.  I was making batches and batches of cookies, baking half immediately and half on the next day and all the recipes I tested did not taste as good if you didn't chill the dough.  This recipe though?  These cookies are delicious.  And, these cookies taste good hot.  Because honestly, I've found that most cookies don't taste good hot.  Most cookies are way better after you've let them cool.  These babies are tasty all the time.  Basically, I'm repeating myself over and over again.  This recipe is wonderful and these cookies are delightful.

More importantly, I've included in the recipe below, all of the notes that I put into my recipe when sending it to my sister who has previously messed up break-and-bake chocolate chip cookies.  If you follow all my notes in the recipe, you will be golden.  You will look like a pro.  So be kind to yourself and your loved one: make these.  Bake these.  Eat these.  You will find happiness.


Saturday, May 10, 2014

Love and Lobster Risotto

B. and I moved into our apartment together in July.  It was my first time living with someone (and I mean someone whose relationship with me was not "female roommate"), and it was our first time being truly together on the same side of the ocean.
I remember two meals from then.  The first was the meal we had the day we moved into our apartment.  We had signed the final papers at 10:30am, spent all day moving things out of my storage unit and into our new apartment in the pouring rain, and then we'd gone to Ikea to buy a bed.  At this point it was past 7pm and we hadn't eaten all day.  We went to the food court and I had the famous Ikea meatballs for the first time.  I was sweaty, ravenous, and exhausted.  The food tasted amazing.
The second meal was a few weeks later.  The furniture we'd bought had just been delivered so we finally had a dining room table.  We'd been so caught up in all the business of settling into our new place, I wanted us to have a date night at home.  At luck would have it, lobster was on sale at the local market.  We bought two, broiled them, and ate them with steamed broccoli, corn, and rice.  It was lovely.  But this wasn't the meal I want to tell you about.  It was the remnants from that meal that made a second meal.
I'm one of those strange people who likes the "torso" of the lobster more than the tail, and so we had tail meat leftover, plus all the lobster shells and little tiny leg pieces.  There is so much meat you can't get out of shellfish and it occurred to me that this might be an excellent stock base.  I combined some shallot, a little bit of onion, and all the lobster shell pieces into our new pressure cooker and 20 minutes later, out came an incredible seafood stock.  And while flipping through our pressure cooker manual, I saw a recipe for pressure-cooker risotto.  It was too perfect of an idea to let pass.


The seafood stock (with a little help from some butter and rice) became lobster risotto, studded with the pieces of tail meat.  It was heavenly.  That meal we didn't talked much, but we scraped our bowls clean, and afterwards we leaned back in our chairs and smiled at each other in the comfortable quiet of our home.
B. and I have eaten many, many meals together since then - some great, some ordinary; some memorable, some forgettable - but this meal and this memory I hold dear.

I will note that the picture I have doesn't look like the typically texture of risotto - not quiet creamy enough - but this is actually because we had a little problem with our pressure cooking allowing steam to "leak" out, which meant that we lost quite a bit of the cooking liquid.  The first batch of "risotto" was therefore more akin to stove-top cooked rice, but the second batch I made (which, of course, there is no picture of) was perfect, and the risotto had the creamy, dreamy, perfect texture.


Saturday, August 24, 2013

Mini Cherry Pies


Confession: I have never truly made pie dough from scratch.

I love to bake, but my thing is normally cookies and cakes.  If I made pies or tarts, normally I just buy a grocery store crust.  Is that terrible?

But then the other week I saw a recipe for mini cherry pies that you can make in a muffin/cupcake tin!  The recipe, which, of course, involved making pie dough from scratch, seemed delicious, and sweet dark red cherries happened to be sale at the grocery store, so it seemed like good time to try the recipe and to try my hand at making pie dough from scratch.  Also, miniaturizing desserts is a great way to make them easy to pack for lunch or even to entertain (no messy cutting and serving)!


I know cherry season is ending soon, but this recipe is perfect, even with frozen cherries or end-of-season bruised/not-so-beautiful fruit.  The cherry, vanilla, and rum flavors are classic, and this pie dough was a cinch to make and tasty just as flaky and perfect as I hoped it would.


Thursday, December 20, 2012

Mexican Hot Chocolate Brownies


I don't like brownies.  Really.  I don't see the appeal in them.  Most brownies just taste like chocolate and flour, and I don't mean that in a good way.  I find 99% of brownie recipes to be one note. They are dense, and taste of cake-y chocolate with no real character and after about one bite, they get incredibly dull.  If a dessert requires a cup of coffee, a scoop of ice cream, or whipped cream in order to be good, then it is not a good dessert.  Good desserts should be able to stand on their own.

So it goes without saying that I rarely ever make brownies, yet here I am, posting about a brownie recipe.  I like this recipe so much the first time I made it, I had to make a second batch the next day to be sure that it wasn't a fluke.  This is no mistake: this recipe is gold.

The brownies that this recipe turns out are just sweet enough, but not at all cloying.  You don't need coffee or milk or ice cream to make these good.  In fact, I've eaten them for breakfast.  The espresso in the batter heightens the deep flavor of the dark chocolate, and the cinnamon adds a warm background fragrance.  Best of all are the lingering notes of black pepper and cayenne pepper.  They add just enough heat to makes your tastes buds light up, but it isn't at all overwhelming.  In fact, I find the spiciness rather comforting.  Of course, you can adjust this to your liking.  The first time I made this recipe, I omitted the cayenne pepper but used freshly ground black pepper.  It was delicious.  The second time I used both.  Also delicious.  Seriously, I have no complaints about this recipe.

If you're like me and you don't normally make brownies, I beg you to make an exception in this case.  Or if you the type of person who loves brownies, I highly suggest trying these.  The recipe is very easy to make.  I did this in a food processor for easy clean up, but you can also make this with a standard mixer.

Happy Holidays all!

This pictures speaks for itself.  Make these brownies.

Monday, July 16, 2012

Kitchen Tricks & What I've been up to

Summer is always busier than I think it will be.  There are always farmer's markets I wish I had the time to visit, recipes I wish I had the ingredients and patience to try, people I mean to meet up with, and chores I ought to be taking care of.

I have a basil plant I've been caring for and, to my absolute glee and excitement, it has been thriving on my window sill.  The farmer's market across the street from me in back in full swing.  In a little bit over a week, my sweet B. will be flying back here to visit.

I have had friends come visit me and explore some fun restaurants and spots in the city.  Navigating New York feels so much more comfortable to me now than it did four years ago when I first ventured there by myself.  I've slowly crossed places off my Must Visit" list.  I have been meaning to share my experiences here, but I simply haven't had the time.

Yesterday was my birthday and one of my oldest friends came up to celebrate with me.  When I was thirteen, he was my first boyfriend; he held my hand, walked me home from the bus stop, and listened to my stories.  We grew up together.  Now, all these years later, he still is my best friend.  He understands my crazy side, my weird side, and my foodie side.

For my birthday, he woke up at 6am and drove over 300 miles to visit me.  He washed my dishes, let me practice eliciting reflexes on him by hitting him repeatedly with my reflex hammer, and then took me out to the city where he treat me to three delicious desserts, one after the other.  I've always believed that dessert is the best part of eating out.  Dessert before dinner is wonderful.  Three desserts of my choice in the middle of the day?  Now there's a good day.

Top left: honey lavender gelato and Turkish fig gelato.
Bottom left: various doughnuts from The Doughnut Plant, including rose, creme brulee, and lavender.
Right: brioche donut filled with nutella

Sometimes it's the simplest things that means the most.


And since this is a blog about food, I thought I might clumsily transition into a few simple tricks to use in the kitchen.  These little tricks and tips are things I've learned from years of cooking and baking in the kitchen and from watching my mom and dad.  I hope this makes up for the lack of recipes and reviews.


  1.  Bake with rum.  Or bourbon.  They both add a very nice fragrance to baked cakes and such.  Just pour a splash into your favorite recipe (cakes, pie fillings, bread pudding, banana bread)

  2.  Add salt.  Seriously.  Even to the sweet stuff.  Add a pinch to hot chocolate, a dash to a fruit smoothie.  Remember salt especially when baking.  But also remember to taste.  A little bit goes a long way.

  3.  Cook with a bit of sugar.  This is especially true with meat and spicy food.  Making ribs or chicken?  Add a teaspoon of sugar to the rub/marinade.  Sprinkle a bit into your beef stew.  You'll be amazed at how sugar can round out your flavors.  This is especially true with homemade tomato sauce.  A little bit of brown sugar works wonders.

  4.  Don't have brown sugar on hand?  Use molasses and white sugar.  Depending on whether you want to make dark or light brown sugar, combine one cup of granulated white sugar which either 1 or 2 tablespoons or unsulfured molasses.

  5.  Don't have buttermilk on hand?  Use milk and lemon/lime juice.  To make one cup, use a scant milk (whole fat is best, but skim work as well) plus the juice from one-quarter of a lime or lemon.  Let this sit at room temperature for about 10 minutes.  Presto!  Instant buttermilk.

  6.  Have lemons, limes, or oranges on hand?  Wash them thoroughly and then zest them and freeze the zest.  Citrus zest is a great way to add flavor to baked goods, salad dressings, and even drinks!  Citrus zest will keep in the freezer in an airtight container for about 2-3months.

  7.  Using vegetables for soup?  Caramelize them first in a pan with some butter; it really brings out their flavors.

  8.  The easiest way to add flavor to something you're baking when you don't have vanilla on hand or you want something to have a little kick of caramel flavor but you don't want to make caramel?  Brown the butter.  Does the recipe not have butter?  Toast the flour.  All it takes is a hot pan and some attentive eyes.

  9.  My absolute favorite baking trick that's also good for your electric bill and the environment?  I turn my oven off about 5 minutes early.  That's right, when my baking is just about done, I turn off the oven and leave the pan in the oven.  Normally I let my baked goods (or even meat, like ribs or chicken) sit in the oven, which is still hot, for about 10 minutes.  Then when everything is perfectly cooked, I smile inwardly about the electricity I just saved.  Also, if you're like me and you're the type of person who normally keeps cookie dough on hand, after baking a chicken or using the oven for some other reason, if you just just turned off an oven that was at about 350-375F, you can pop in a tray of cookies and have them done in about 30-35 minutes while the oven cools (for a recipe that normally bake in 10-15 minutes with the oven on).  How great is that?  Of course, this will vary from oven to oven and with different recipes, but it is a very efficient way of using the heat from the oven that otherwise is just wasted.  You can also toss a garlic head in a ramekin with some olive oil, cover it with foil, and put that in the oven to get some nice oven-roasted garlic in half an hour.

That's all the tips I can think of for now.  I wish I had one more to round out the number to 10, but instead, I leave you with one more dessert.  Life is sweet.

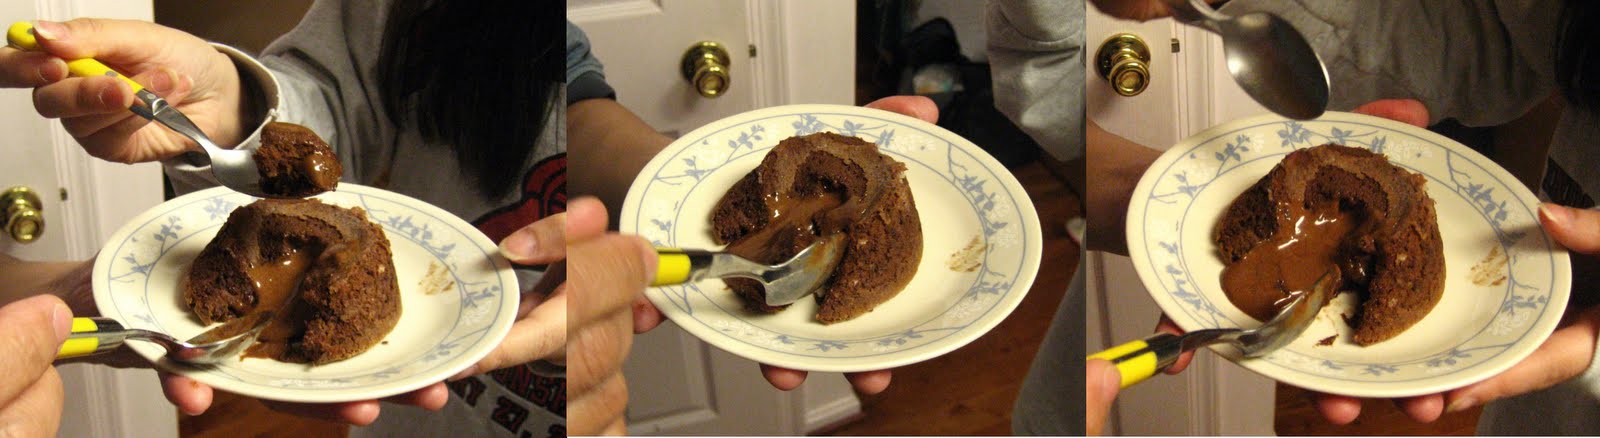
Warm chocolate bread pudding with vanilla sauce

Friday, June 8, 2012

The Best Banana Bread You'll Ever Taste

This is the stuff, my friends.  Look at it.  Moist, dark, full of flavor.  Well, you can't tell the last thing just by looking at the picture, but I assure you it is true.  This banana bread has rum, dark chocolatecaramelized sugar, and deep vanilla and warm spice tones.  What more could you ask for?
It is delicious sliced cold with a glass of milk for breakfast.  It tastes good fresh out of the oven, and it tastes even better on the second day, once the flavors have really melded together in the fridge.  This is breakfast, lunch, afternoon snack, dessert... heck, you can have this for dinner.

One-quarter cup of rum and one full tablespoon of vanilla extract go towards making this the most flavorful banana bread I've ever eaten.  The salt also rounds out the flavor of the banana and the dark chocolate chips that are studded throughout the bread elevate this to the status of heavenly.

The first time I made this recipe I actually forgot to count how many cups of flour I had put into the batter so I wasn't sure if it was 2 cups or 3 cups.  The batter seemed liquidy in the pan, but when it finished baking, it had a lovely bread-pudding texture that I absolutely adored.  The second time I made this, I actually used the right amount of flour and I got a true banana bread.  I actually prefer the bread-pudding results, but it's a personal preference thing, so both ratios are included below.


Thursday, February 9, 2012

"Buttermilk" Roast Chicken

Buttermilk and chicken are a classic combination.  In fact, when I hear the words buttermilk and chicken together in the same sentence, I automatically think moist, tender, and flavorful.  Buttermilk marinades are often used for fried chicken, which is delicious, but also unhealthy, not to mention a nuisance to make at home (it's messy and  makes the whole house smell like oil).  So how can we get both delectable crispy skin and moist and tender meat at the same time without frying?  Well, with the recipe I'm about to give you.

Besides having incredibly tasty results, this recipe is great if you're busy because it requires no special attention.  The chicken has a long marinating time during which you can leave it in the fridge and forget about it for a day or two, and then while it is roasting, you don't have to worry about checking on the chicken constantly either.

And, to make this recipe even easier, it requires no special ingredients.  This is why "buttermilk" is in quotations; this recipe doesn't actually use buttermilk.  Why?  Because let's be honest, how many people out there normally have buttermilk in their fridge?  I know I don't.  I do, however, almost always have milk and yogurt on hand.  So that is what I used.  This combination is a great substitute, and it tastes every bit as delicious as the buttermilk version.

The end result is a very healthy meal of moist and tender chicken with lightly browned, crispy skin.  Serve it with a side of rice and some asparagus or green beans and you have a fast and delicious dinner, no sweat.

A busy life doesn't mean you can't eat good food.


Tuesday, December 20, 2011

The Best Ginger Cookies you'll ever eat in your life


Really.  Stop your searching.  This is it.  These are the best ginger cookies you'll ever eat in your life.

They are spicy, intoxicating, slightly chewy cookies with crispy edges.  They smell delicious and they taste amazing.  They are so good I'm scrapping all the other recipes I've ever tried.  I've made these cookies four times in the past week.  I can't get enough of them.  I have no more left and just thinking about them makes me want to go whip up a batch right now at 3am and bake some just so I can eat some more.  Thank goodness it's the holidays so this kind of behavior isn't deemed too inappropriate.

These cookies are laced with ginger.  They have ground ginger, fresh ginger, and crystallized ginger.  I know most people don't keep the last ingredient in their kitchens commonly, but it is worth it to buy yourself some.  I bought mine on Amazon for a very reasonable price.  The crystallized ginger really adds great warmth to the flavor of the cookies and are an integral part of what makes the cookies spicy in a mellow, round way (not at all overwhelming).  The original recipe doesn't call for browned butter or cinnamon, but I love the depth of flavor the browned butter adds to the cookies and the fragrance and warmth that the cinnamon imparts.  They are perfect for the holidays.  They are just the kind of thing you want to share with family and friends, and they are delicious with a tall glass of milk.

I'm salivating just writing about these.  I think I'm going to have to make another batch.  I think you want to too.


Sunday, December 11, 2011

Two Types of Gingerbread Cookies

As I mentioned in my previous post, The Great Food Blogger Cookie Swap has been bringing dozens of cookies to bloggers across the nation for the past couple weeks.  I thought about baking my popular oatmeal chocolate chip cookies, or maybe my caramel scented chocolate chip cookies, but I've already posted both of those recipes, and according to the rules, this recipe had to be an unposted one.  I also wanted the cookies to have a holiday feel to them, something to snack on with a cup of milk in hand, while wrapping presents (you know, if you're the type to wrap presents early).  So I went with a quick and easy gingerbread recipe that requires no wasted time rolling and cutting shapes.  In fact, if you don't want to, you don't even have to chill the dough.  It has just enough ginger to be lightly spicy, but is well balanced by cinnamon, all spice, and cloves, and gets just enough of a little kick from some black pepper.  The recipe for these gingerbread cookies makes about 40, which is just perfect, since one batch was enough to mail a dozen to three random food bloggers.  Olivia over at Love, Life, and Pictures was one of the recipients, and she took this gorgeous picture of the gingerbread cookies I sent her.


If you're looking for a more adult, more dark and spicy cookie, this second recipe is for a more mature crowd.  They are laced with real ginger and rum.


Sunday, June 12, 2011

Lemon Bars


I've been in a funk for a while and for some reason I just haven't felt the same about cooking, baking, or posting.  Which is very odd for me.  Cooking and baking are usually my go-to activities, especially when I have a fully stocked kitchen and great seasonal ingredients.  Which I do have right now.

But I just haven't really felt that wonderful feeling of happiness I normally associate with cooking.  I made pork belly today with king oyster mushrooms and onions and while it was good, I felt no real satisfaction in making it.  I also made a strawberry rhubarb crumble.  It was my first time cooking with rhubarb.  And no real excitement.  It was good, but I don't feel compelled to share it with you.

Instead, I offer you lemon bars.  I made these a few days ago because we happened to have a lot of limes in the house.  And, yes, I made my lemon bars with limes.  So really, I suppose, they should be called lime bars, but that just doesn't have the same ring to it that the name "lemon bars" does.  So lemon bars.

This recipe has been a long time family favorite.  My parents are crazy about them and I've made them as gifts for family friends many times.  They were also the defining baked good of one of my relationships.  It's funny; I have certain recipes that I inextricably associate with people.  My oatmeal chocolate chip cookies will always make me think of Josh.  My apple tart cake always reminds me of my dad.  These lemon bars always make me think of E.

When we first started dating, E. came over fairly often and to my surprise, he sometimes rummaged my kitchen and fridge.  I had never had anyone just come over and open my fridge before, so it startled me quite a bit that he did it so naturally, but I was blinded by my infatuation.  On our third or fourth "date" (I put that word in parentheses because he was just coming over to watch movies), he discovered a container of lemon bars on the counter.  Of course, he was interested in trying them.  So, we sat down in the living room with the container and we snacked on them while smiling at each other and half-watching something on the TV.  And then, the inevitable happened.  The taste of lemon bars was in both of our mouths when we kissed, and when we pulled back from the kiss, E. told me with a smile that that was the best tasting kiss he'd ever had.  I thought it was one of the sweetest things I'd ever been told.  I've baked him these lemon bars several times since then, and I am still reminded of that summer when I think of this recipe.


As I said before, I normally use limes for this recipe.  Limes are generally cheaper than lemons at the market, and no one can really tell the difference anyway. Also, one lime typically yields more juice than one lemon, so it is an economical choice.  But, if you feel the need to be "authentic," the recipe works with lemons just as well as it does with limes.

This standard recipe one 8x13 pan, but I normally find that that simply isn't enough to satiate my family and friends, so I make the recipe slightly bigger and make an 8x13 pan and an 8x8 pan so there is a lot to go around.  The bars keep well in an air tight container at room temperature.  They keep even longer in the fridge.  And when I say "even longer" I mean almost two weeks, if you're a hoarder, like myself.

These lemon bars are delicious when served with blueberries, strawberries, or peaches.  Of course, they are also great alone.


Wednesday, May 11, 2011

Molten Chocolate Cake

I've been slow about posting lately because life has been so busy, but to make up for it, I have a delicious recipe to share.  One that is fast, easy to make, and delicious.  Did I mention that it's chocolate?  Or more specifically, molten chocolate cake.

That's right.  I know how to apologize properly.  Seriously.  Wait till you taste this.  But since you can't taste it until you finishing reading this and make it for yourself, you can judge how delicious it was by how quickly it was demolished by my family.


This is where I also should tell you that I am the only person in my family who actually likes dark chocolate.  From the speed at which this molten chocolate cake was consumed, I think it was a success.

I have actually had this recipe on my hands for a while now, but I never got around to making it.  For one thing, my place in New Jersey didn't have ramekins.  I briefly considered bringing them up just so that I could make these, but this recipe also requires a scale, and a hand mixer, both of which I was also lacking.  It is difficult to live in such barbaric conditions, but such conditions are what I need to make sure that I stay focused on my studies and stay out of the kitchen and away from the oven.  The apartment that I'm moving into in August will be better supplied with baking equipment, however, since this will be more of a permanent move.  The point I'm getting at though is that I made a mistake in waiting so long.  If you've never made molten chocolate cake before, get started now.  It's not difficult and it's absolutely delicious, even before it's baked.  (Not that I recommending you eat the batter, because there are health issues concerning raw eggs and flour, but should some of this batter accidentally fall into your mouth, it is wonderful.)

The recipe I used was Jean George's recipe, which I sought out after eating his delicious dessert at JoJo's in January.  It is very easy to make, doesn't require any special ingredients, and bakes fairly quickly.  You can also make the batter ahead of time, chill it, and pop it in the oven when you're ready for it, which makes it very convenient, since molten chocolate cakes should be served fairly soon after they are done baking.

This molten chocolate cake is rich and, as expected, very chocolate-y, but I don't think it tips over that thin line of being too rich, or worse yet, being heavy.  It isn't complex in flavor, but it is incredibly satisfying, and a great dessert to whip up if you don't have much time but are feeling a little fancy.


We happened to have one extra molten chocolate cake after the other three were consumed, and I covered that ramekin with plastic wrap and left it in the fridge.  The next day, I ate it cold.  It was still delicious.  It didn't run in that "lava" or "molten" way that the hot cake did, but it had a great texture, like a half-chocolate-cake, half-chocolate-mousse dessert.  And anyone who knows me knows how much I enjoy chocolate mousse.  Yum!  The pictures below are the molten chocolate cake on Day 2.


Friday, April 1, 2011

Oatmeal Chocolate Chip Cookies


I hesitated for a long time about sharing this recipe.  It's not because there's anything wrong with it; quite the opposite, actually.  I wasn't sure about sharing this recipe because as much as I love sharing food and knowledge, I also like to keep some secrets.  This was one of them.

Since high school this was, and still is, my most popular recipe among my friends.  In fact, my best friend (and at one point boyfriend), Josh still raves about them.  It was my go-to gift for him: Valentine's day, Christmas, and random surprises.  The majority of the time when I made these Oatmeal Chocolate Chip Cookies, at least some of the cookies were going to him.  In fact, I still associate this recipe with memories of him and thus these cookies always make me smile.

Last summer, Josh asked me to teach him the recipe because he wanted to use it to bake cookies for someone he was interested in, and then just a couple weeks ago, he asked once more for the recipe and instructions.  He isn't much of a cook or baker, so when I came home (to Maryland), we got together so that I could show him how to make these cookies.

It wasn't until I started showing him that I realized how much more goes into making food than just the ingredients.  There are very specific things that I do that I sometimes forget to write down because, having done them so many times, the steps seems so logical to me.  For example, not using cookie dough right away.  Even before the New York Times came out with its "research" on how to make the best chocolate chip cookie (which I still haven't tried, because I like my cookie too much), I was freezing or refrigerating my dough for at least a day.  At first it was for the convenience of time.  In high school I couldn't afford to make cookie dough and bake cookies in the same night; it was too much to do after coming home from track or cross-country practice with all my homework to do as well.  But then I noticed that my cookies had a better texture when the dough wasn't used right away.  They spread less; they were chewier and more moist; they caramelized better.  I've also learned how truly important it is to cream the butter and sugar for long period of time and to beat in the eggs, milk, and vanilla until the "batter" is essentially frosting.  The lightness of the cookie depends on this step.

What is posted below makes enough dough for two tall cylindrical plastic containers (the kind you get from take-out Chinese food) of cookie dough, and makes enough cookies for at least 4 or 5 trays of baking.  These don't spread a whole lot—that’s what the refrigeration step does for you—but I also shape my cookie dough “balls” into thick pancakes, and so I can fit a good number of fat cookies on each sheet, maybe 9.

These oatmeal chocolate chip cookies are light, moist, and relatively healthy.  They don't have an over abundance of butter or sugar, and I think their texture makes them more fun to eat than plain chocolate chip cookies.  They'll keep for about a week at room temperature, in an air tight container, but sometimes I will freeze them or refrigerate them after baking.  In the fridge they will keep for about two weeks; in the freezer, about a month.  I know that sounds strange, but I like the taste of cold cookies sometimes.  Because of their airiness, the cookies never actually freeze to an icy hardness, but instead get very cold, and the chocolate chips snap in your mouth in a very satisfying way.


Also, as a testament to how good these cookies are, I couldn't even snap a picture of all of them after baking, because they were gone so quickly.  I do like the close ups, though, and the very first picture on this post gives you an idea of what size my cookies are so you can have that reference for baking times.

Happy baking!


Tuesday, March 1, 2011

Monkey Bread


When I bake or cook with my friends, I have a tendency to keep things simple.  Even though it is, most of the time, me just cooking with my friends around me watching, I don't like making things unnecessarily complicated, should someone want to help out.  Hence, our desserts together are often from cake mix, which I spice up a little bit with espresso powder, cocoa powder, cinnamon, or rum (among other things).  This time, I decided to go with an incredibly easy childhood classic: monkey bread.

For those of you that never had monkey bread growing up, it's like cinnamon buns, but easier.  In other words, this stuff is sweet, addictive, unhealthy, and will make your house (or apartment) smell like heaven.  It is everything you shouldn't eat, combined together, and baked to form a gooey, buttery, fluffy mess.

I learned this recipe from my cousin, who got it from her school, which was the only school in our county that still taught Home Ec. when we were growing up.  We used to make it during sleepovers.  Eating it the other night brought back great memories of my middle school days.

Warm monkey bread, a glass of cold milk, and a couple great friends: happiness can be so simple.


Wednesday, February 23, 2011

Caramel Fruit Tart


My mom makes the best fruit tarts in the world.  Really.  I have given up on trying other fruit tarts or experimenting with other recipes because it's just not worth it.  This one is The One.  With men, sometimes it's not always clear, but with baked goods, you just know.  So I'm telling you, you don't need to look anymore; I am sharing the secret with you.

Why is this fruit tart recipe so amazing?  Besides the fact that the pastry cream is delicious and honestly tastes just as good when it is hot and freshly made as it does when it is chilled and ready to be served, this tart also has an extra little oomph that no other tart has: a caramel crust.

After baking, the tart crust is covered with pure caramel—no cream, no butter, just pure, golden, melted sugar.  The beautiful amber liquid solidifies to add a textural dimension that is unique to this tart.  One bite and you'll know that nothing else will ever compare.  This tart will ruin all other fruit tarts for you.  And the caramel is what makes this tart The One.

If you look at the picture below, you may feel that the layer of caramel is too thin, but really the idea is not to smoother the crust in caramel, but to just have that surprising "shatter effect" upon biting into the tart.  Also, adding too thick of a caramel layer throws off the balance of sweetness.  I don't like my fruit tarts too sweet.

The recipe here is enough for two fruit tarts, which, trust me, you'll want to have, even if it sounds like a little bit much.  Remember, it's always nice to share!  But if you're feeling conservative, you can half the pastry cream recipe and only bake one tart shell.  And while the recipe instructions say not to wait more than six hours after assembly to consume this piece of art, I've eaten leftovers from the fridge more than a day after making the tart, and I've still found it to be delicious.

Assembling the fruit tart.

Caramel Custard Fruit Tart
adapted from The Dessert Lover's Cookbook by Marlene Sorosky

2 pre-baked tart shells

For the caramel
½ cup sugar
2 tbsp water (a little over)


For the custard
6 large egg yolks
½ cup sugar (roughly 115g)
1/3 cup all purpose flour (50g)
2 cups hot milk
1 tsp vanilla sugar (or extract)
1 stick salted butter, cut into small pieces
pinch of salt (optional)
assorted fresh fruit, like peaches, plums, kiwi, and strawberries

To make the caramel
Place the sugar and water in a small saucepan and heat over medium heat until the sugar has dissolved.
Increase heat to medium high and bring to a boil, stirring occasionally until the sugar turns copper. Watch carefully, as it burns easily once it has reached this point.
Working quickly, pour the caramel onto the baked crust, rotating and turning the crust to even coat the bottom. Do the same for the second crust (try to divide the caramel evenly).
Set the tart aside until the caramel cools and hardens. Remember, hot caramel causes very painful burns so use care.

note: If you prefer to have a more caramel, simply increase the proportions to 3/4 cup sugar and 3 tbsp water.


To make the custard
Whisks the yolks in a medium-sized heavy saucepan. Add the sugar and flour and whisk until creamy (I use a hand mixer here).

Slowly whisk in the hot milk. Place over medium heat and cook, stirring constantly until the mixtures begins to bubble. Lower the heat slightly and continue cooking, stirring constantly until thick and smooth.
Remove from heat and stir in butter, a small amount at a time. Stir in the vanilla.


Allow to cool. The custard can be refrigerated overnight, just be sure to stir before using.

No more than 6 hours before serving, spread the custard over the caramel crust. Decorate by arranging an assortment of sliced fruit in concentric circles.  My favorites to use are peach, kiwi, and strawberry.

Optional: To make a glaze, combine 1/3 cup apricot jam, seedless raspberry jam, or orange marmalade with 1 ½ teaspoons of water. Bring to a boil in a small saucepan. Brush the glaze over the fruit to cover.

Refrigerate until ready to serve, but not more than 6 hours, or the caramel will soften and melt and the tart shell will become soggy.

Serves 8.

Friday, February 11, 2011

Chocolate Mousse


Growing up, I remember one of my favorite desserts to order when my family went out to eat was chocolate mousse.  At my favorite restaurant, they served it in a tall fluted glass and I thought it was so classy.  Of course, this illusion of class was completely shattered when I diligently and repeatedly scraped down the sides of the glass to make sure I scooped up every single last bit of that delicious chocolate mousse and licked my spoon clean when everything was gone.

Sadly, you don't find chocolate mousse much now in restaurants; it appears to have fallen out of favor, perhaps because food trends moved towards chocolate bacon and salted caramel.  In fact, while looking at food blogs recently, I remember reading a post where someone called it a dessert of the 80's.

I think it's time we brought this dessert back.  Nothing else can compare to a good chocolate mousse, with its silky, smooth texture and airy lightness.  I've never met anyone who didn't like chocolate mousse.  And with Valentine's Day coming up, if you're planning on making something nice for your loved one (or for yourself!) this recipe is a nice option because it can be made ahead of time and then enjoyed leisurely at the end of a meal without being overkill.  Plus, eating chocolate mousse is sexy.  Eating chocolate chip cookies, not so much.


Some chocolate mousses can be incredibly rich, but I think that this recipe is perfectly balanced.  It is creamy but light and not too sweet.  It also has a teensy bit of alcohol.  The original recipe calls for brandy.  I've never had brandy.  When I bake or cook, I generally use rum.  I grew up in a house that always had rum.  When we make cake mix at home, my mom always substituted some of the water with rum.  I learned from her genius.  Rum makes things better.  This may sound like the motto of an alcoholic, but considering that I don't really drink and when I do, I prefer a glass of sweet white wine or dessert wine, I really don't think you have any need to be concerned.  That said, this recipe is not at all boozy.  The scent of the rum is very faint, but if you're serving it to young children and you're concerned, you can always replace it with water.

This recipe also uses raw egg whites.  I've never had any problems with using raw eggs, but I know some people who have concerns.  I don't really have any suggestions, except to use the best eggs you can.  I used organic free range brown eggs.  Avoid this recipe if you are pregnant or are serving it to someone else who is pregnant.


Thursday, November 11, 2010

Mini Cheesecakes

I was intimidated by the idea of making my own cheesecake for a long time. First of all, many cheesecake recipes involve making a huge 9-inch cheesecake and baking it in a waterbath and then turning off the oven and leaving the cheesecake in the half-open oven for a designated period of time and it all seemed like so much work for something which I would either have to eat all by myself, or which I would have to make to share with company, without knowing how the results would turn out.

But then I found this recipe for mini cheesecakes a few years ago which is not only simple, but also requires no water bath. It is also delicious and relatively quick.

This recipe makes about 12 mini cheesecakes, which can be baked directly in muffin tins. I especially like this recipe because it gives you a nice thick crust (which I like). If you're not a huge fan of the crust, then simply make thinner crusts and pour in more filling! If you have extra graham cracker crumb, you can easily bake this for about 5-10 minutes (depending on how much you have), and it makes an excellent topping for ice cream, yogurt, or baked fruit.


For the crust:
1 ¾ cups graham cracker crumbs
3 tbsps sugar
Pinch of salt
4 tablespoons melted butter

For the cheesecake:
½ lb (one 8-ounce box) cream cheese, at room temp
1/3 cup sugar
pinch salt
½ tsp vanilla extract
1 large egg
1/3 cup heavy cream

Stir the crumbs, sugar and salt together in a medium bowl. Pour over the melted butter and stir until all of the dry ingredients are uniformly moist.
Butter your cupcake tins.
Divide the crust ingredients among the cupcake tins. Use your fingers to pat an even layer of crumbs along the bottom of the pan and up the sides a bit (to create a nice crust).
Put the pan in the freezer while you preheat the oven.
Preheat oven to 350°F and bake for 5 minutes.
Set the crust aside to cool on a rack while you make the cheesecake.
Reduce the oven temperature to 300°F.

Beat the cream cheese at medium speed until it is soft, about 4 minutes.
Add the sugar and salt and continue to beat another 4 minutes or so, until the cream cheese is light.
Beat in the vanilla. Beat in the egg. Remember: you want a well-aerated batter.
Reduce the mixer speed to low and stir in the heavy cream. Once incorporated, beat till completely smooth.

Pour an even amount of batter over each cheesecake crust.
Bake the cheesecakes at 300 degrees for about 15 minutes on the middle rack (time can be anywhere from 15-20 minutes), until they seemed fairly set, although still a bit jiggly in the center. Then, turn off the oven, leaving the cheesecakes in the oven. Leave for 10-15 minutes.
Remove from oven and cool.
To remove the cheesecakes from the cupcake tins, I find it easiest to just throw the entire pan (after it has cooled a bit) into the freezer and removing the frozen cheesecakes. They hold their form better that way. Refrigerator-chilled cheesecakes tend to cling to the pan and break apart.

Enjoy!